Edit representation
Once the structure or structures are uploaded, users will be redirected to the Edit representation page. This page loads the structure(s) and shows a notification warning that the project will expire unless it’s shared. That means that users have until the date shown in the notification for editing and sharing a project. In case of not sharing it after this period of time, all the files and data related to the project will be removed from our database.
In the current version, the expiration time is 20 days.
Following the philosophy of the project, this Edit representation page is open, but protected so that only user(s) with this URL address can access it.
This Edit representation page is the core of the application and we can split it into five parts:
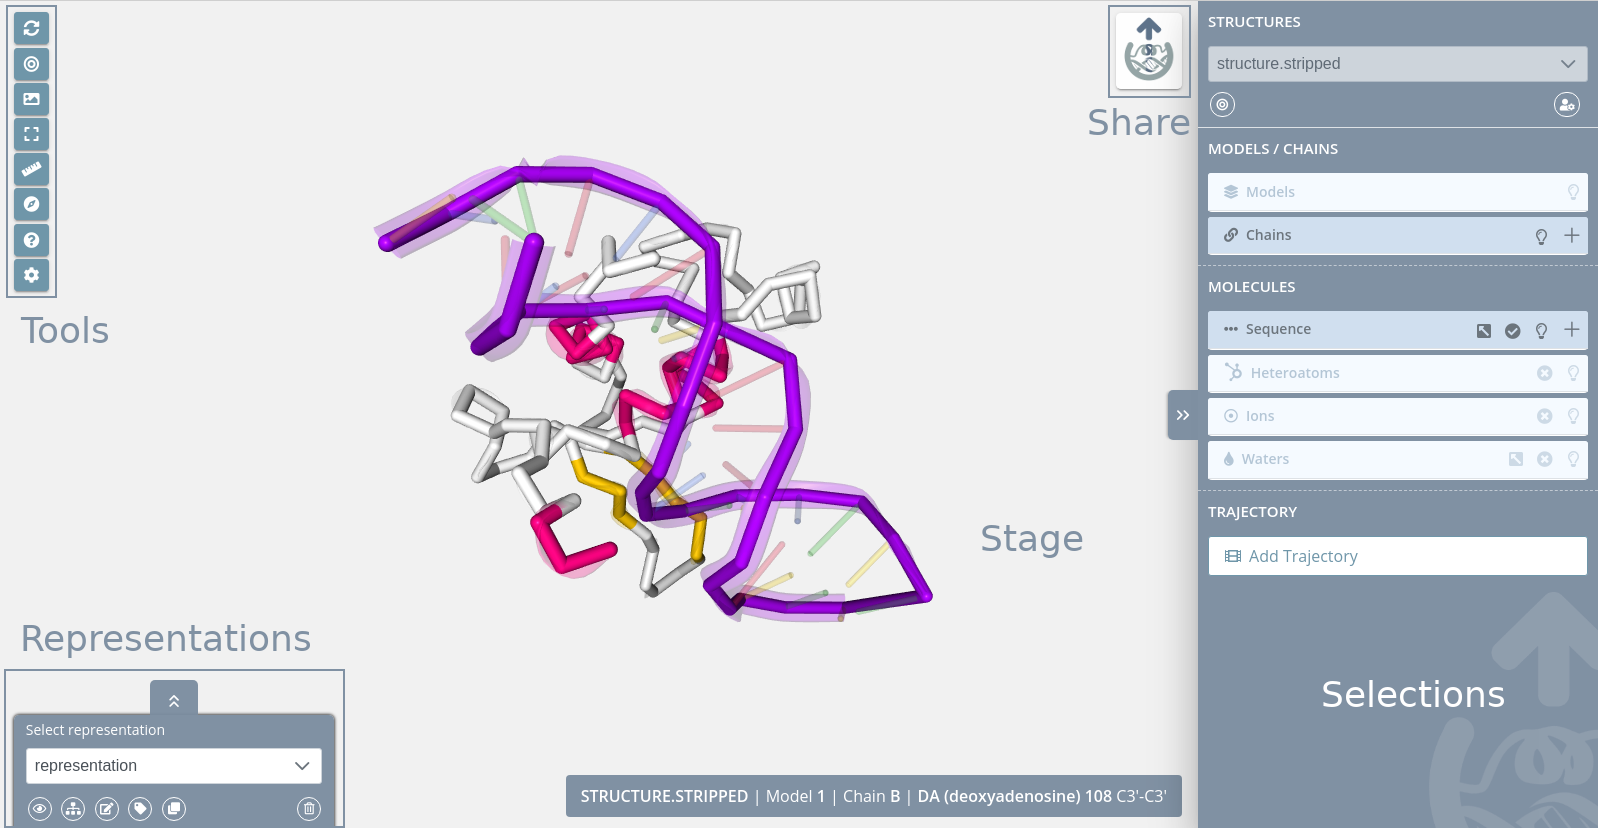
Stage
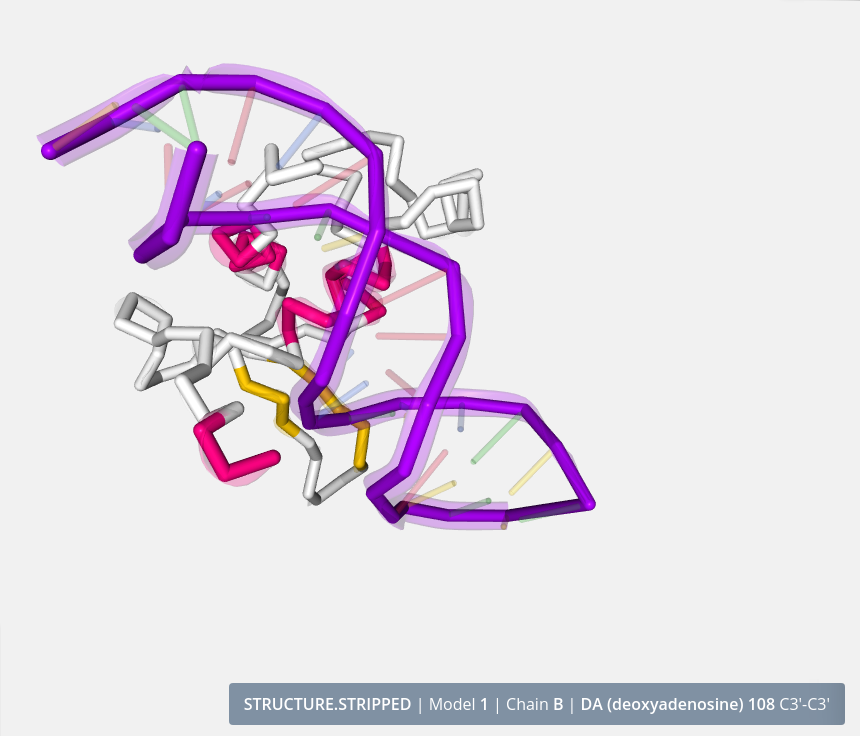
The stage covers the entire screen and the rest of the parts are on top of it. In the stage the structure is loaded and users can interact with it in several ways. At this point it’s important to remember that this application has no Save button. Each change performed over the stage or panel will be automatically saved to the database, so anytime a user can close the browser and then come back to keep working on the edition at the same point it was.
Zoom / Drag
Actions of zoom in and zoom out can be done with the scroll mouse or the trackpad of a notebook:
Clicking out of the structure (that means in the “empty” part of the stage) with the left button and dragging will rotate the view.
Clicking out of the structure (that means in the “empty” part of the stage) with the right button and dragging will translate the view.
Double clicking out of the structure (that means in the “empty” part of the stage) with the left button will center the view.
Mouse actions
Mouse over actions
Passing the mouse over the molecules of the structure will highlight them and show their information in the legend on the bottom right of the stage.
Mouse click actions
Clicking with the mouse left button on a molecule will select it for the current representation. Note that the representations are explained in the Representations section. Only a new representation accepts new molecules. In the default representation no molecules can be selected and this feature is disabled.
Clicking with the mouse left button on a molecule while pressing the Ctrl key will make a zoom in at a molecule.
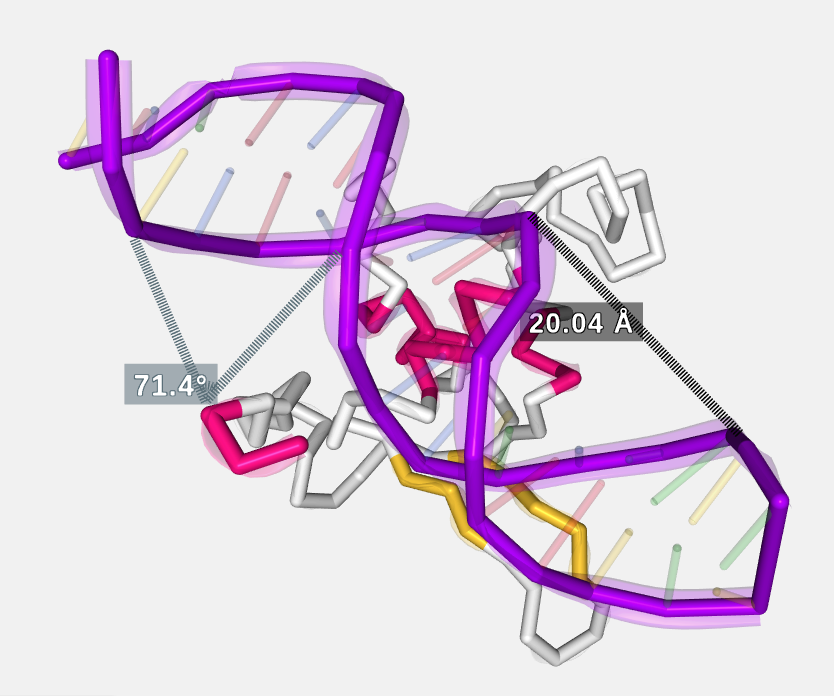
Clicking consecutively on two atoms with the mouse right button will draw and calculate the distance in ångströms between these two atoms. In the default representation no distances can be created and this feature is disabled.
Clicking consecutively on three atoms with the mouse right button while pressing the Ctrl key will draw and calculate the angle in degrees between these three atoms. In the default representation no angles can be created and this feature is disabled.
Legend

As explained in the previous section, passing the mouse over the molecules of the structure will highlight them and show their information in the legend on the bottom right of the stage. This legend shows information about the molecule in the next format:
Structure file name | Model number | Chain ID | Residue name (Residue long name) Residue number Atom name (or Bond)
Tools
The tools menu is at the top left of the stage and allows users to make some actions over it:
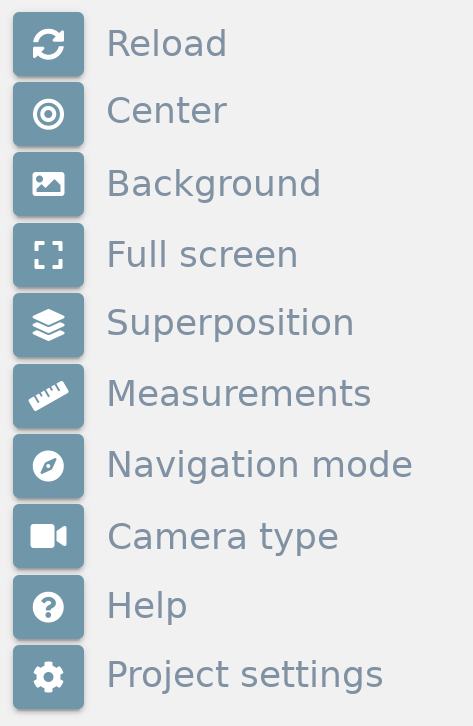
Reload

Clicking this button restores the view to the initial position on the stage.
Center

Clicking this button centers the structure(s) position on the stage.
Background
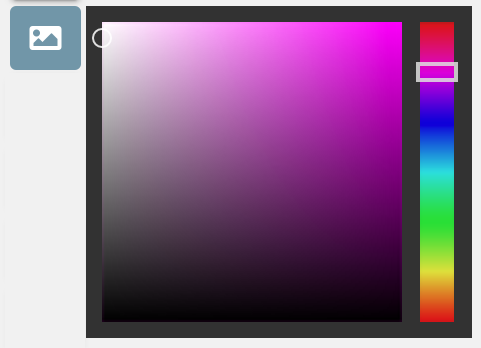
Clicking this button opens a color picker that allows users to change the background color of the stage.
Full screen

Clicking this button opens the fullscreen mode. For exiting full screen mode, just click the button again or press the Esc key.
Superposition

3dRS allows to superpose multiple structures in pairs. Clicking the Superposition button opens a new modal dialog with a list of all the structures present in the project:
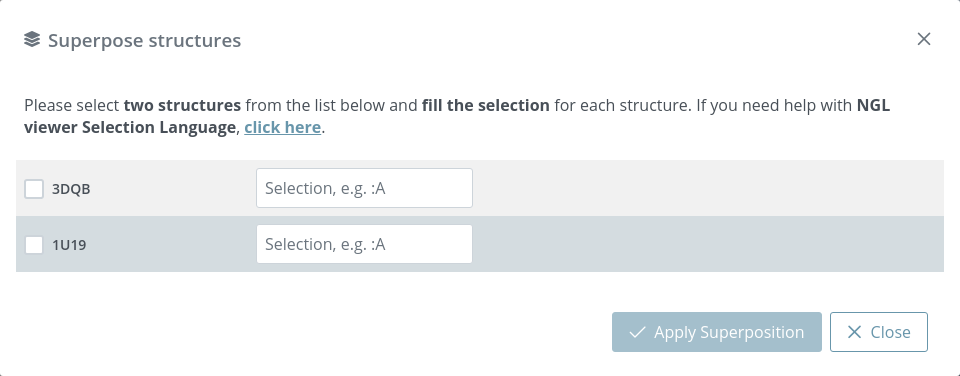
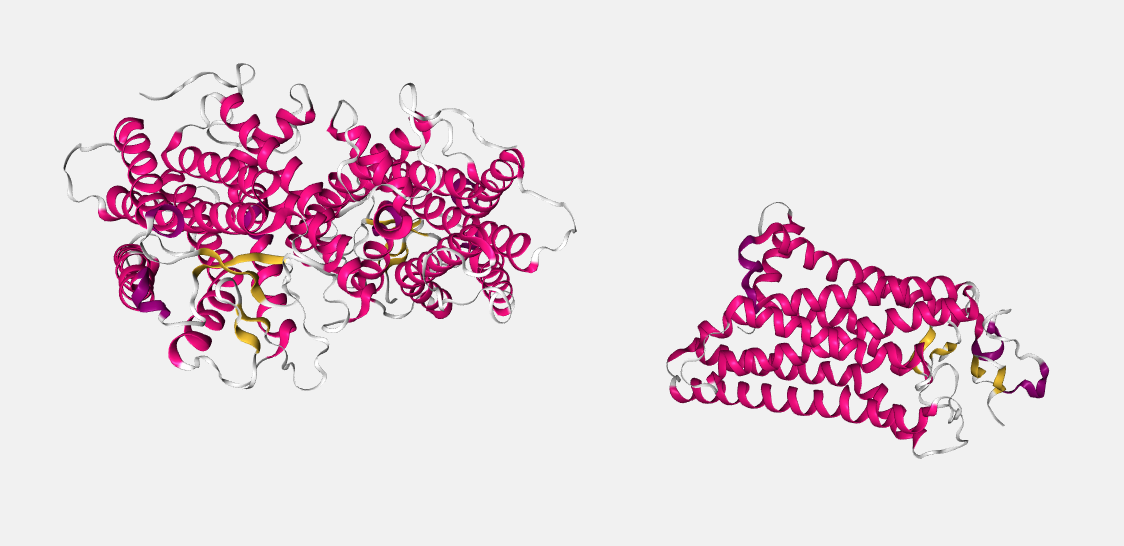
As an example, 3DBQ and 1U19 are shown before superposition:
Users must select two structures and specify in NGL viewer Selection Language the superposition area of each structure. If Selection field is empty, all the structure will be taken as a superposition area.
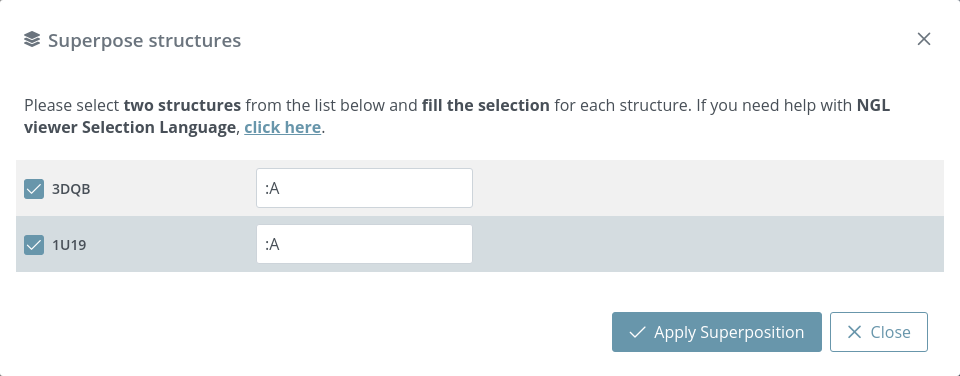
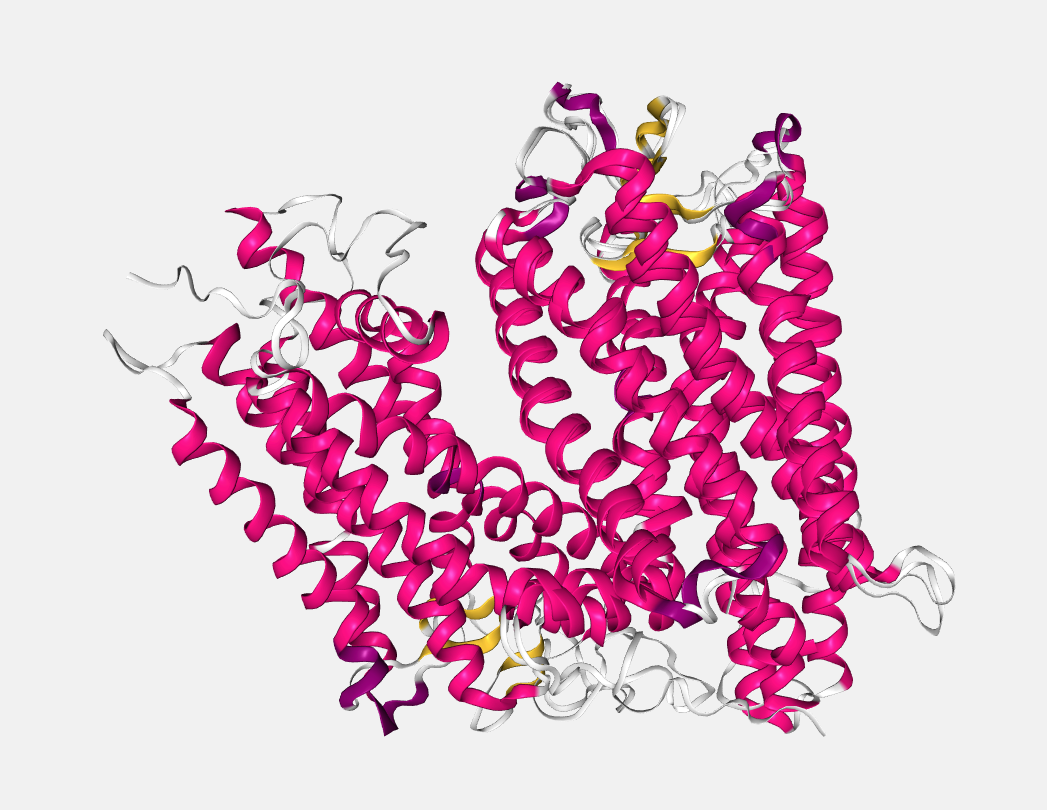
After selecting and clicking the Apply superposition button, both structures will be superposed (in the given example, they have been superposed on the A chain):
Note that this button only appears in case more than one structure has been uploaded.
Measurements

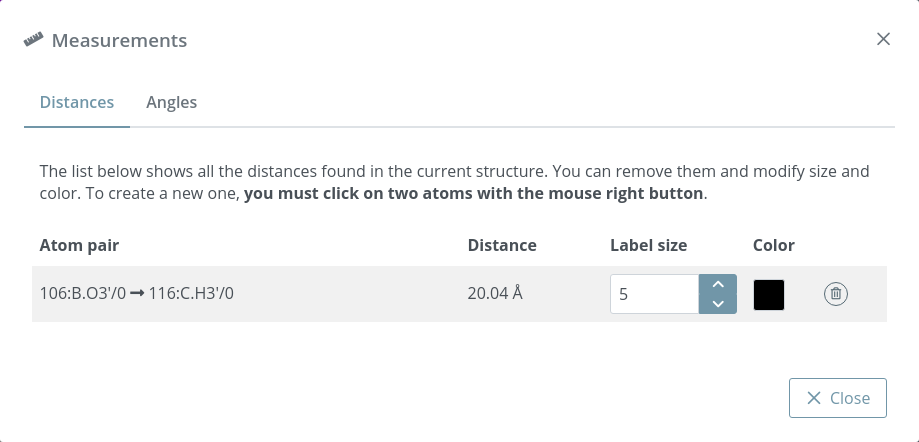
Clicking this button opens a modal dialog to edit the distances and angles created by users in the stage. For remembering how to draw them, please go back to the Mouse click actions section.
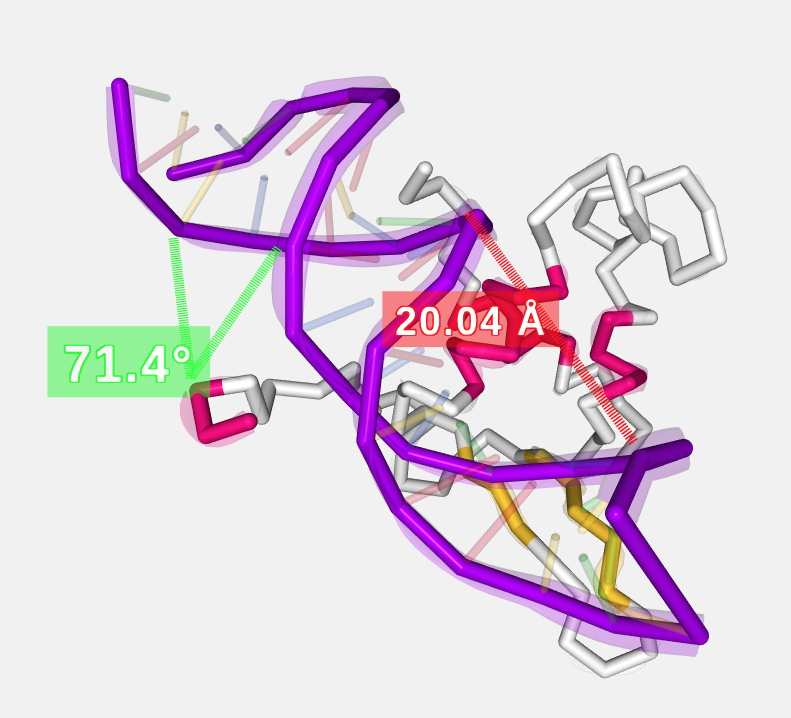
Measurements with size and color by default:
Distances before editing size and color:
Distances after editing size and color:
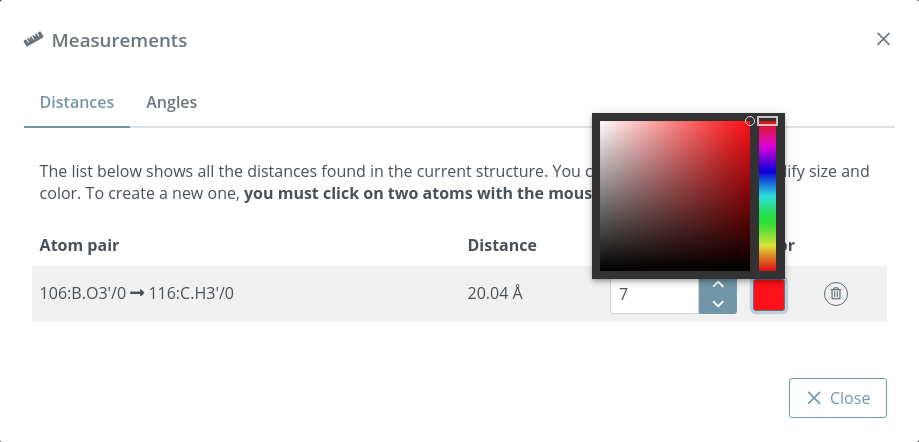
If only a distance is needed (without label), please set 0 as Label size.
Angles before editing size and color:
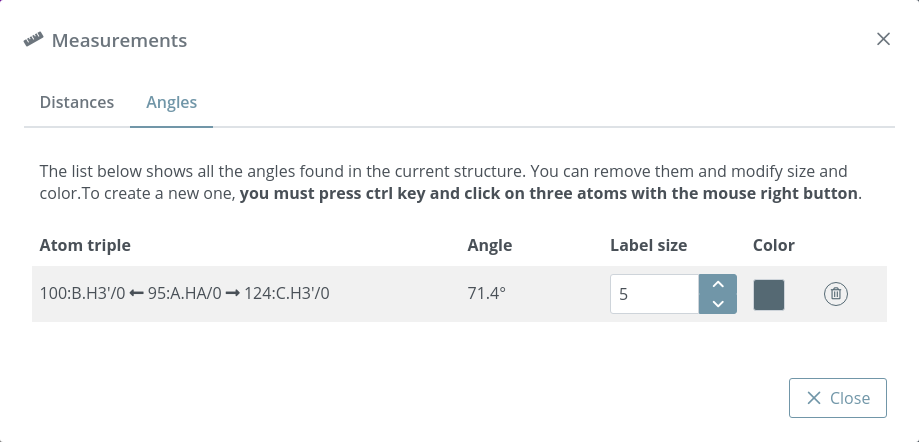
Angles after editing size and color:
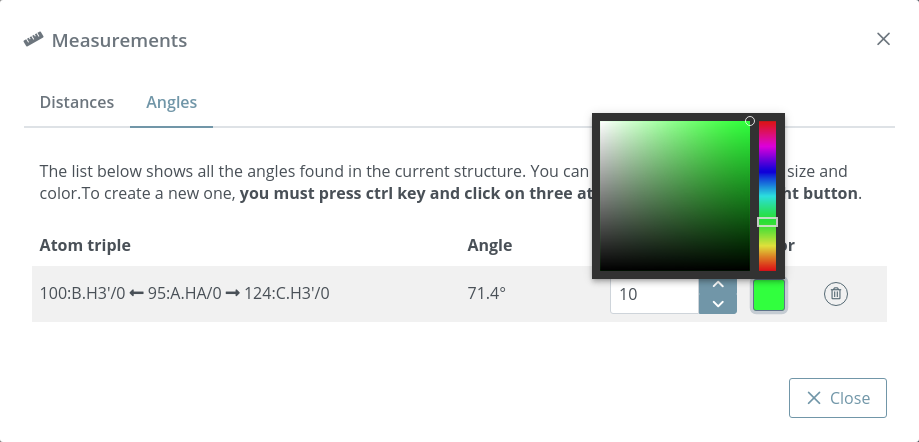
If only the lines are needed (without label), please set 0 as Label size.
Measurements after size and color edition:
In the current version, distances between different structures dont work.
Navigation mode

Sometimes it’s difficult to move the stage without accidentally selecting a residue from it. For the sake of avoiding these problems, a Navigation mode button is provided. Clicking it disables the selection of molecules and the creation of distances and angles.
Once the button is clicked, it turns out its background to white and the compass icon starts spinning:

During the navigation mode, the mouse pointer changes its aspect to a grabbing hand:

The Navigation mode will be enabled until users click the button again.
Camera type

Switches camera type between orthographic and perspective.
Help

Link to this same Read the Docs.
Project settings

Clicking this button opens a modal dialog to edit the project settings:
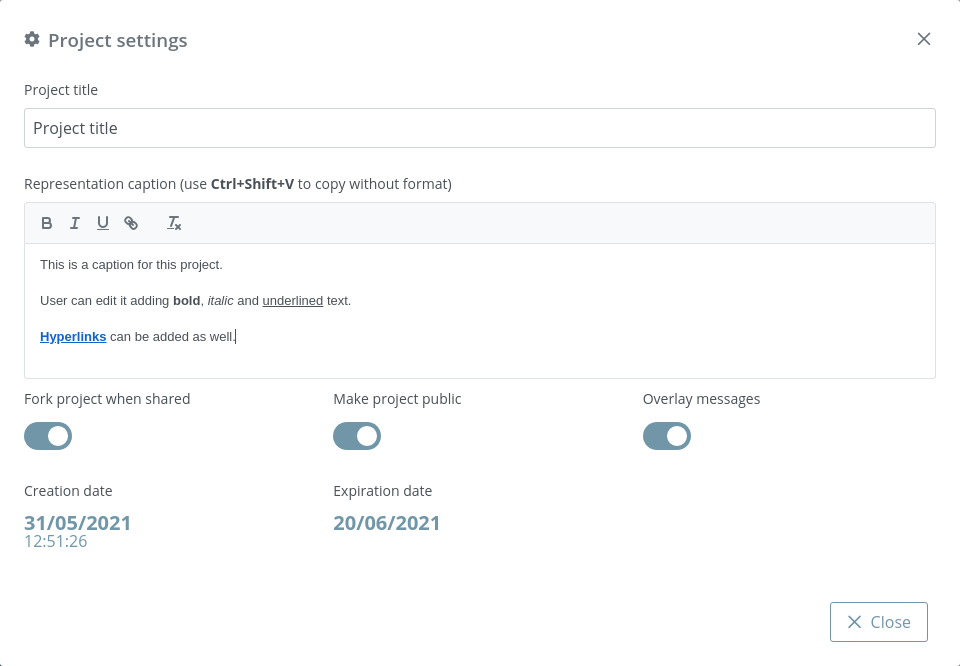
Project title: title of the project. If this field is empty, neither title nor caption will be shown in the project once shared
Representation caption: representative information of the project such as description, author(s), links and so on. Beware of copying formatted text, it can give problems. It’s strongly reccomended to paste text without formatting (via Ctrl+Shift+V or Tx button).
Fork project when shared: if enabled, the project will be able to be forked once shared. That means that anyone can make an editable copy of the project.
Make project public: if enabled, the project will be shown in the home page list along with the rest of latest public projects.
Overlay messages: there are notification messages for almost each action in the application. With this button they can be enabled / disabled. Note that although this option is enabled, the expiration notification will still appear as well as some error messages and the navigation mode prompt.
Creation date: date of creation of the project.
Expiration date: date of expiration of the project. This date will disappear once the project is shared for the first time, since then the project will be persistent.
Representations
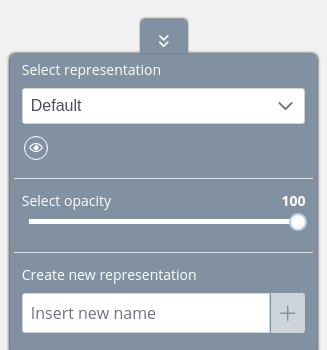
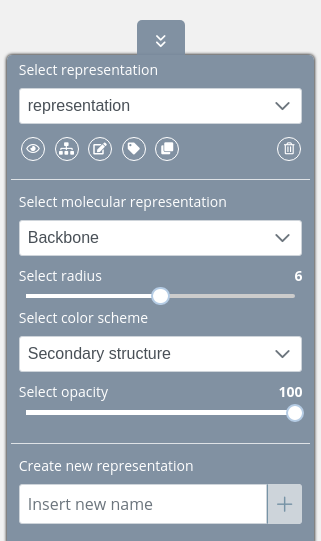
The Representations panel is at the bottom left of the stage and is used for changing the properties of the representation.
Initially, there is a Default representation that only allows to change the opacity and hide or show it:
Once users create a new representation, there are all the properties available:
Representation actions
Below there is a description of all the actions that can be performed in this panel.
Select representation
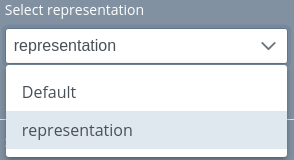
In this dropdown menu, users can switch between all the representations of the project.
Edit representations
Below the select dropdown menu there is a tiny menu for making some actions over the representations.
Hide / show

Hides or show the current representation selected on the dropdown above.
Hierarchy map

Shows a modal dialog with all the molecules selected in each representation:
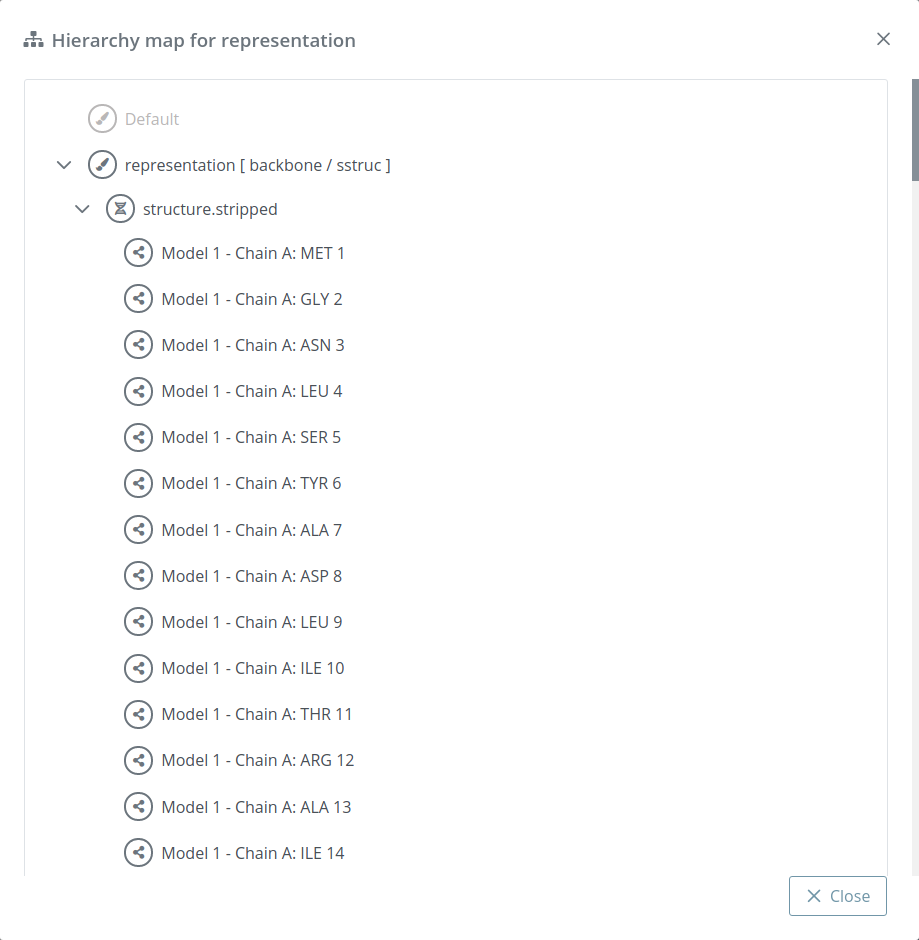
In the default representation this feature is disabled.
Edit representation name

Allows to rename the current representation:
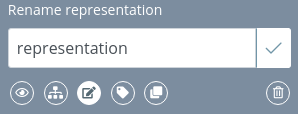
In the default representation this feature is disabled.
Edit label

Clicking this button opens the label edition area:
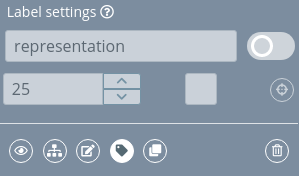
By default, all the actions are disabled until the label is enabled clicking the switch button.
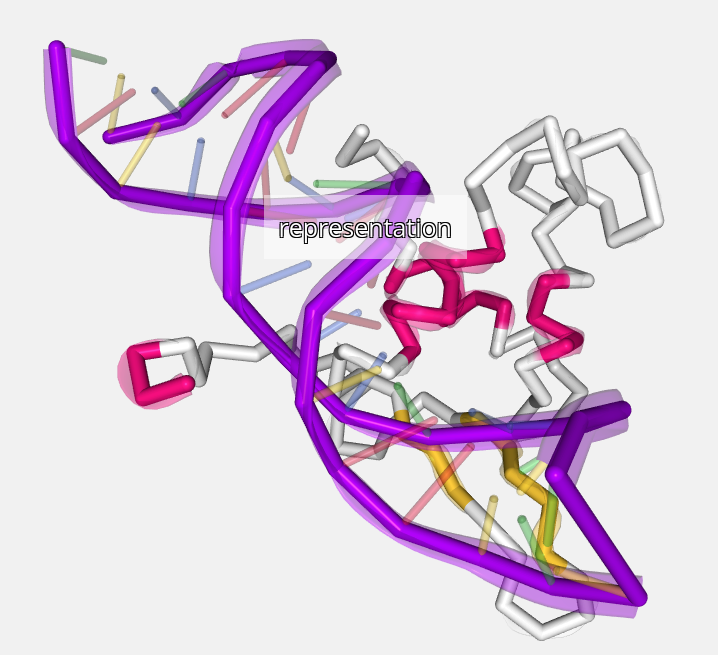
Once the label is enabled, it will appear in the stage with generic size and color and centered in the current selection. Note that the default position varies depending on the structure and the atoms selected. Sometimes the label can be out of the selection or in a non-representative position. In order to fix that, a place label button is provided (explained below).
Generic label aspect:
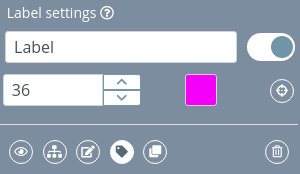
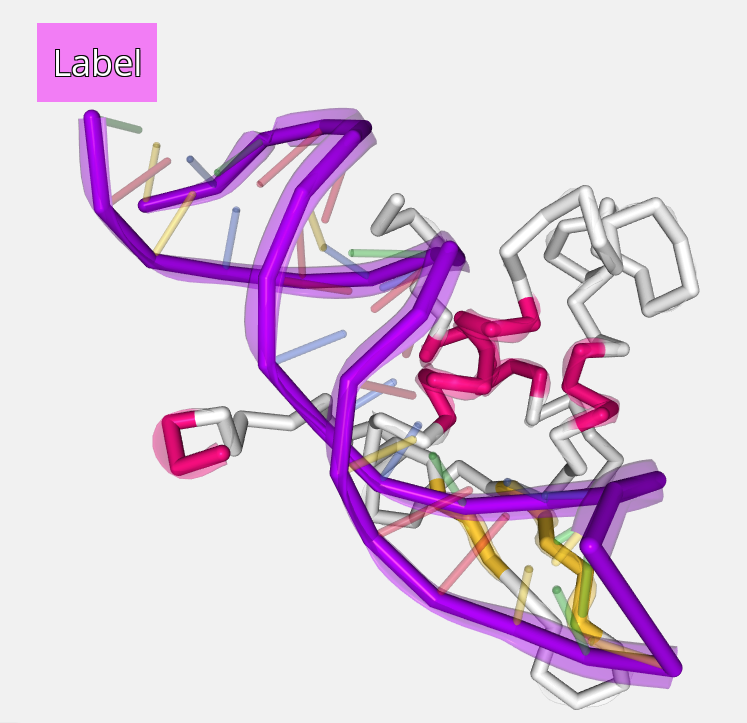
In the label edition area, users can modify the label name, the label size, the label background color and the label position:
To modify the label position, the place label button must be clicked:

Once the button is clicked, it turns out its background to white and the crosshair icon starts spinning:

During this label position mode is active, the mouse pointer changes its aspect to a crosshair:

Note that during this mode, the selection of molecules and the creation of distances and angles are disabled. Picking a molecule only will translate the label to its position.
Edited label aspect:
In the default representation this feature is disabled.
Clone representation

Clicking this button will duplicate the current representation with the same features and selection.
In the default representation this feature is disabled.
Remove

Removes the current representation and all the selections linked to it. This button must be clicked twice in order to ensure that it has not been clicked by mistake.
In the default representation this feature is disabled.
Representation properties
There are several properties that can be modified for each representation.
Molecular representation
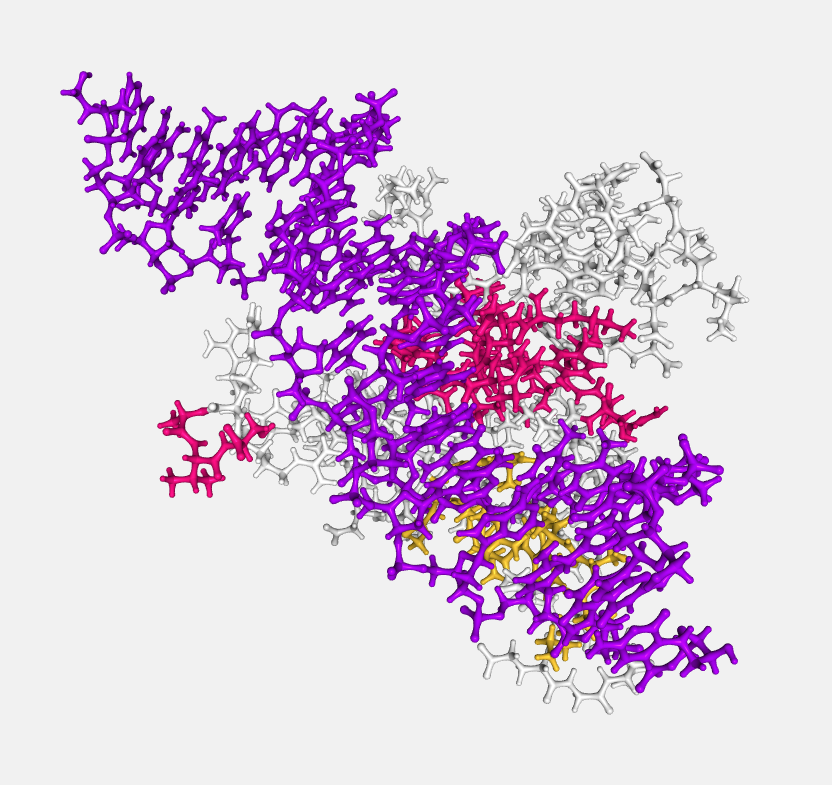
Each loaded structure can be displayed using a variety of molecular representations:
Backbone
Cylinders connect successive residues of unbroken chains by their main backbone atoms, which are .CA atoms in case of proteins and C4’/C3’ atoms for RNA/DNA, respectively. The main backbone atoms are displayed as spheres.
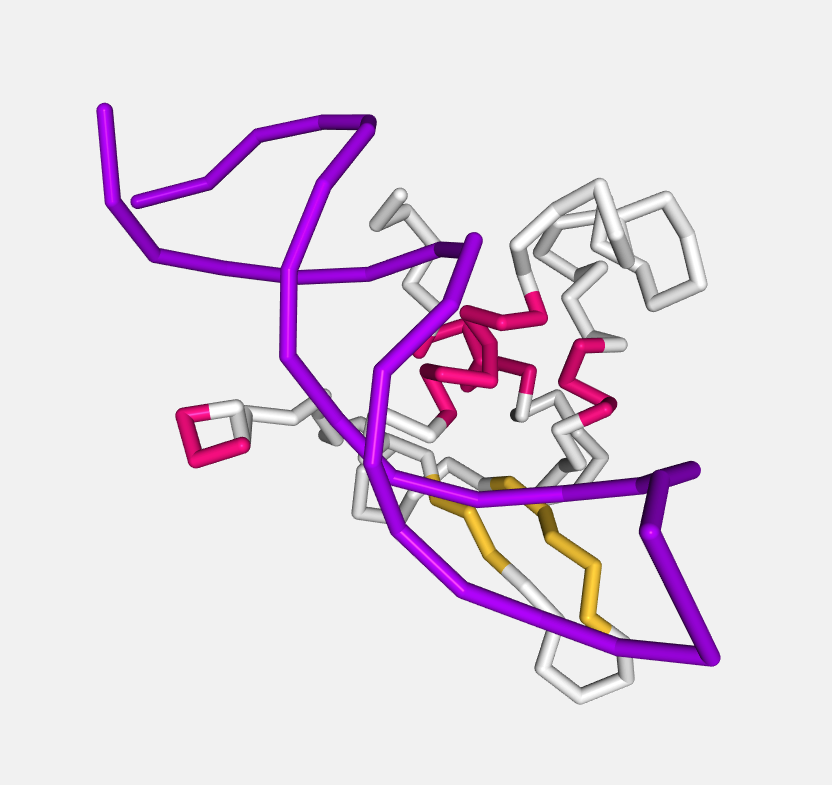
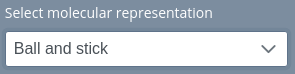
Ball and stick
Atoms are displayed as spheres (balls) and bonds as cylinders (sticks).
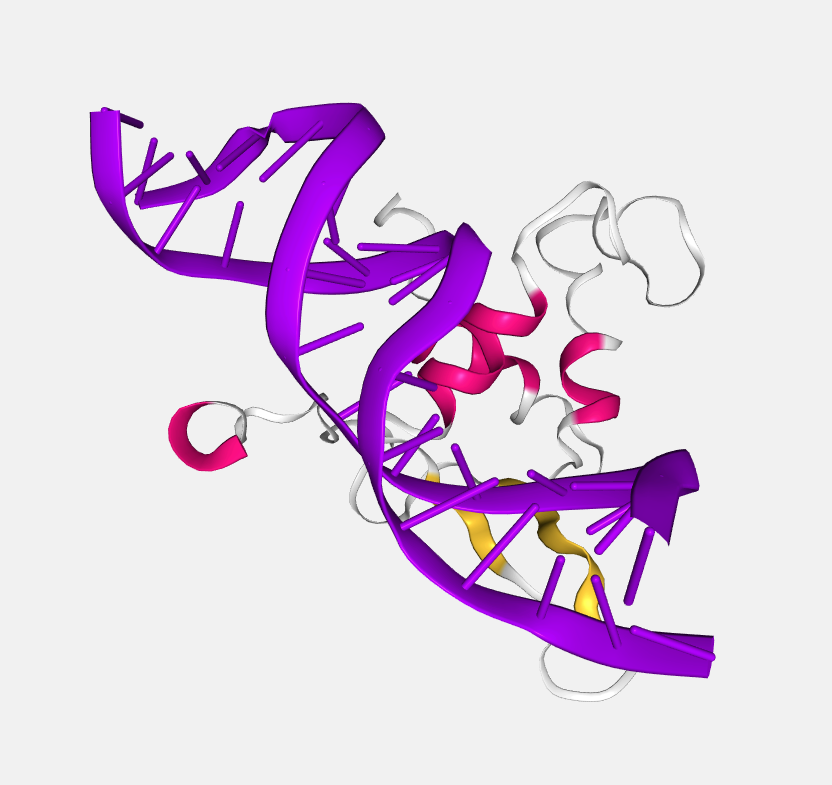
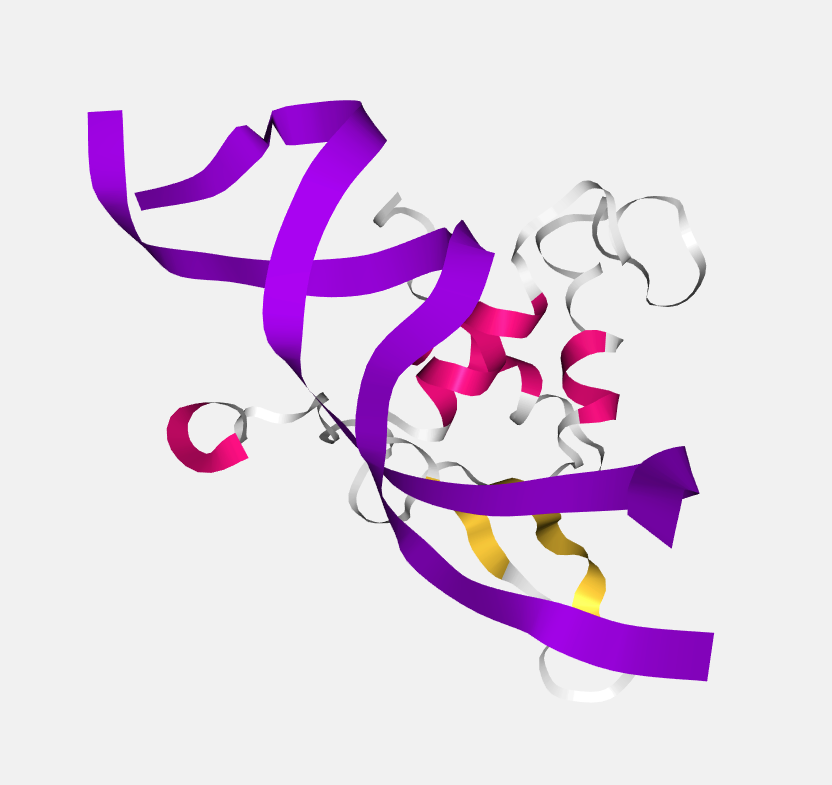
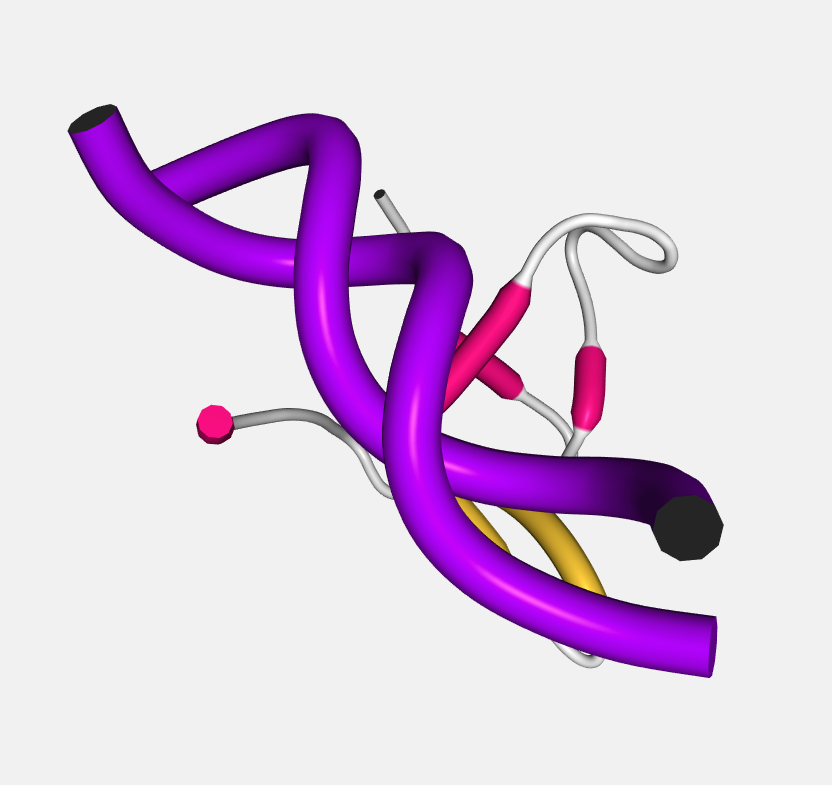
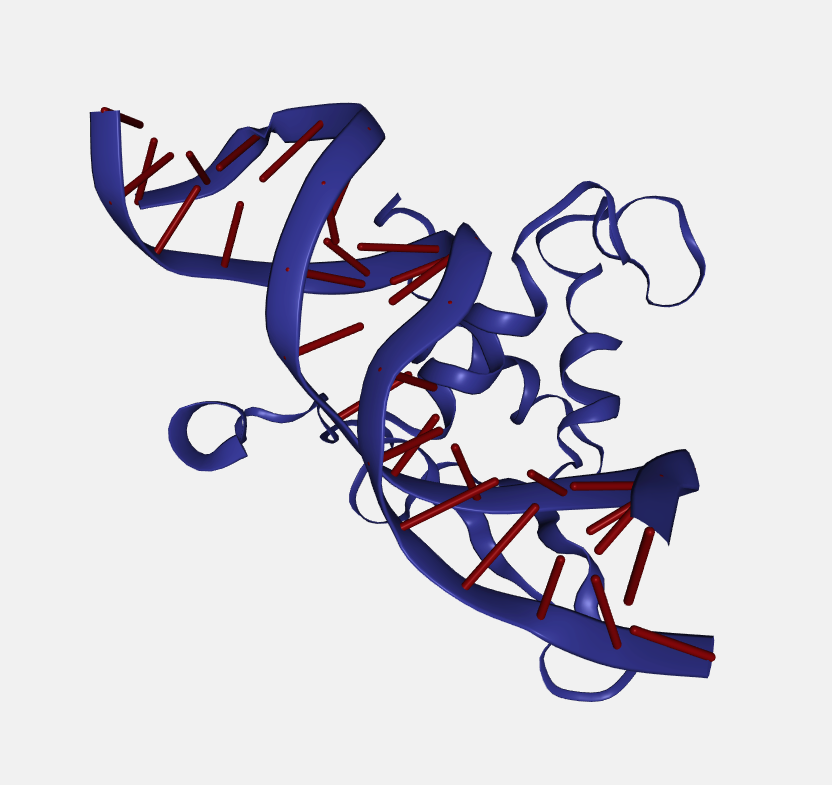
Cartoon
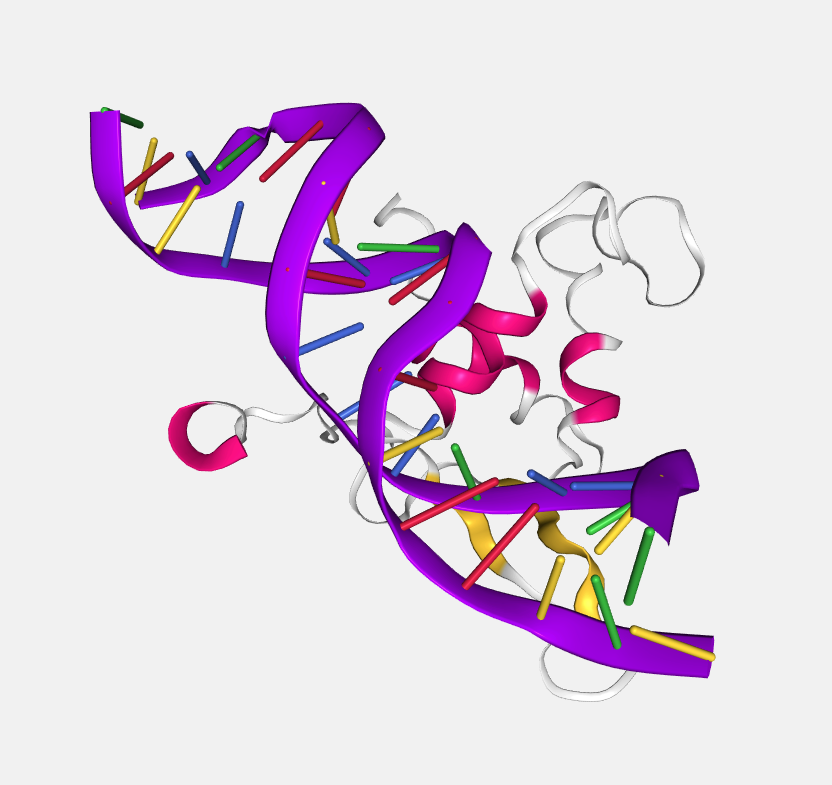
The main backbone atoms (see backbone) of successive residues in unbroken chains are connected by a smooth trace. The trace is expanded perpendicular to its tangent with an elliptical cross-section. The major axis points from .CA in the direction of the .O in case of proteins and from the C1’/C3’ to C2’/O4’ for RNA/DNA, respectively.
If RNA/DNA an additional base representation is added: simplified display of RNA/DNA nucleotides, best used in conjunction with a cartoon representation. Here, a stick is drawn connecting the sugar backbone with a nitrogen in the base (.N1 in case of adenine or guanine, .N3 in case of thymine or cytosine).
Hyperball
A derivate of the ball+stick representation (pioneered by HyperBalls project) in which atoms are smoothly connected by an elliptic hyperboloid.
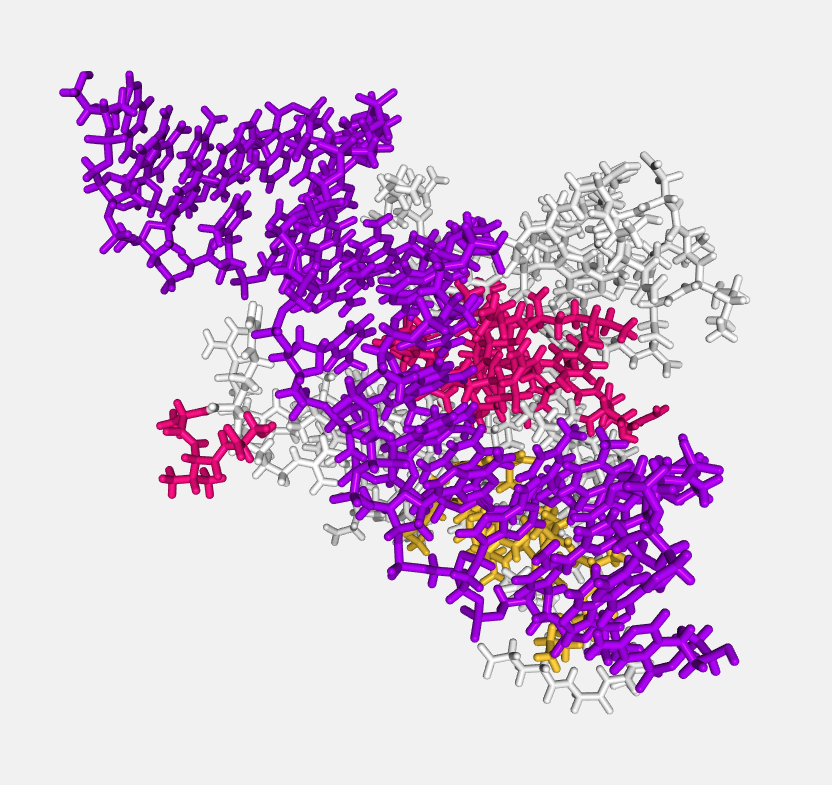
Licorice
A variant of the ball+stick representation where balls and sticks have the same radius.
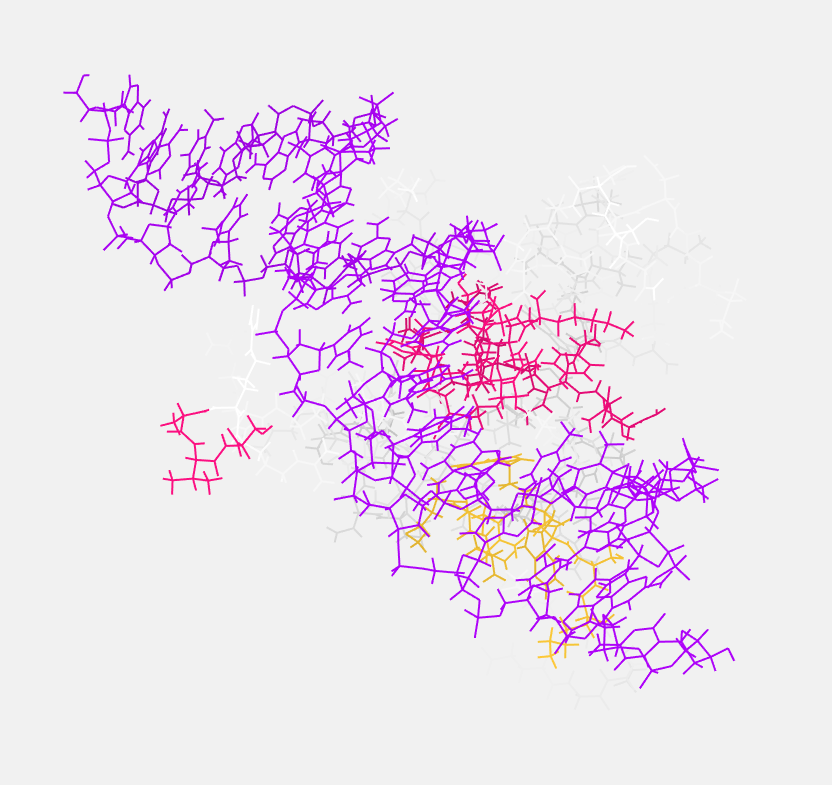
Line
Bonds are displayed by a flat, unshaded line.
Ribbon
A thin ribbon is displayed along the main backbone trace.
Rope
A rope-like protein fold abstraction well suited for coarse-grained structures. In this representation a tube follows the center points of local axes. The result is similar to what is shown by the Bendix tool.
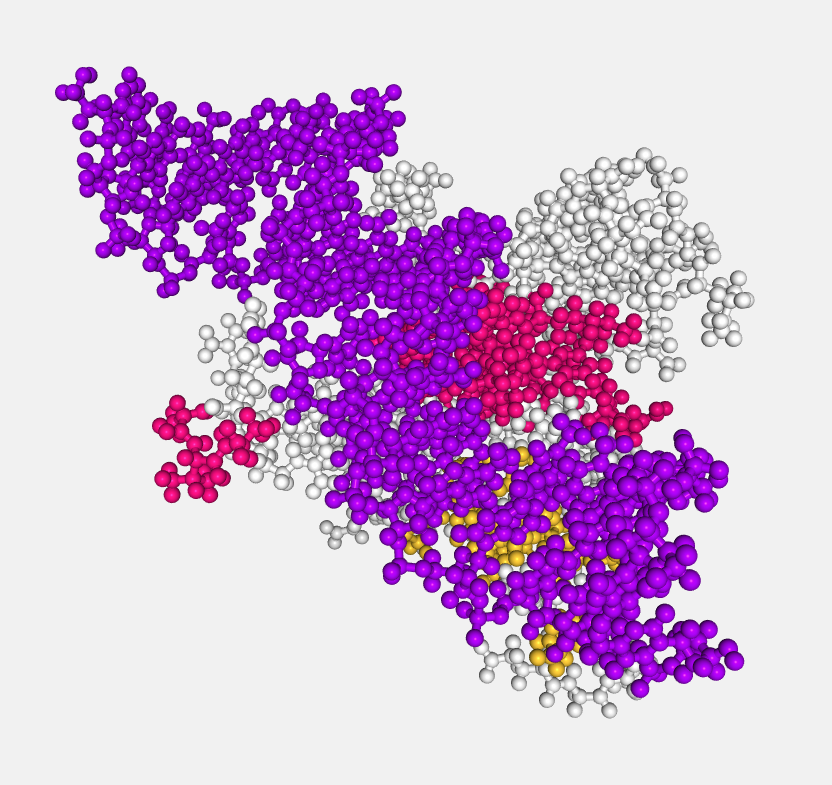
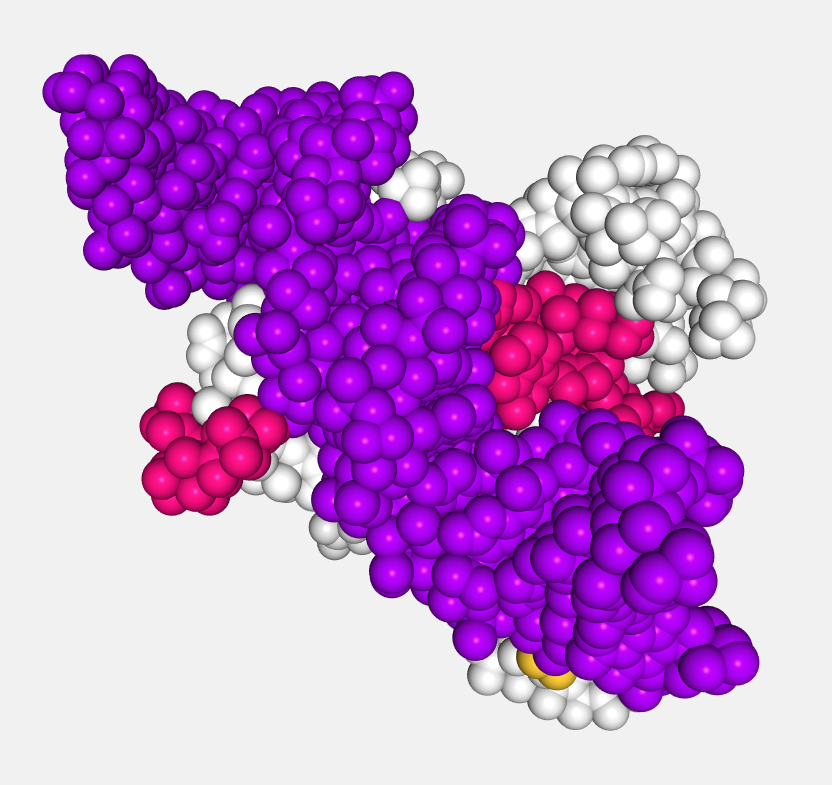
Spacefill
Atoms are displayed as a set of space-filling spheres.
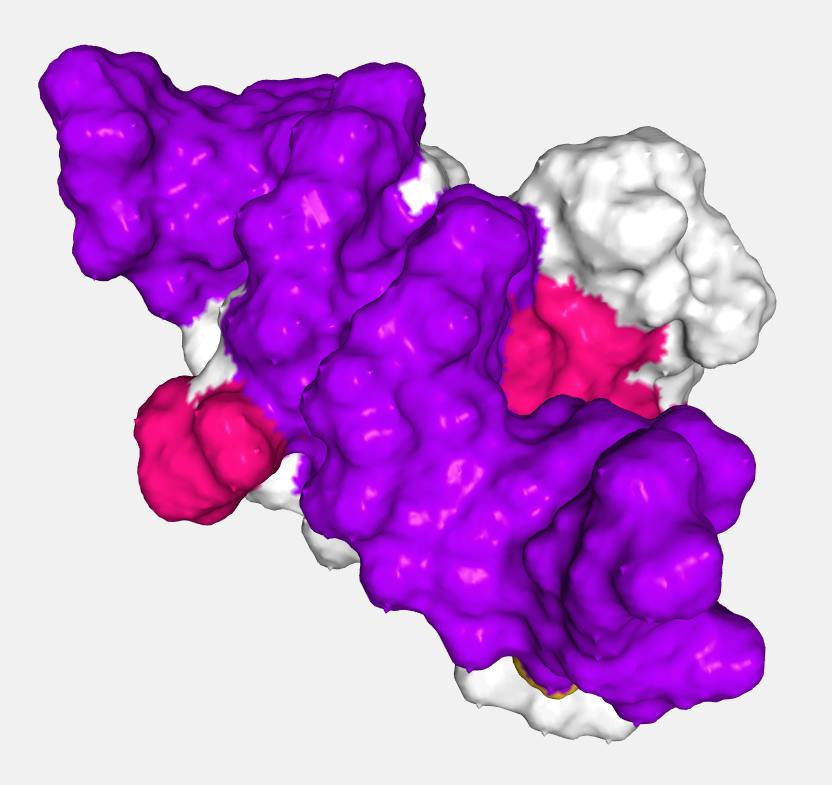
Surface
Displays the molecular surface and its variants.
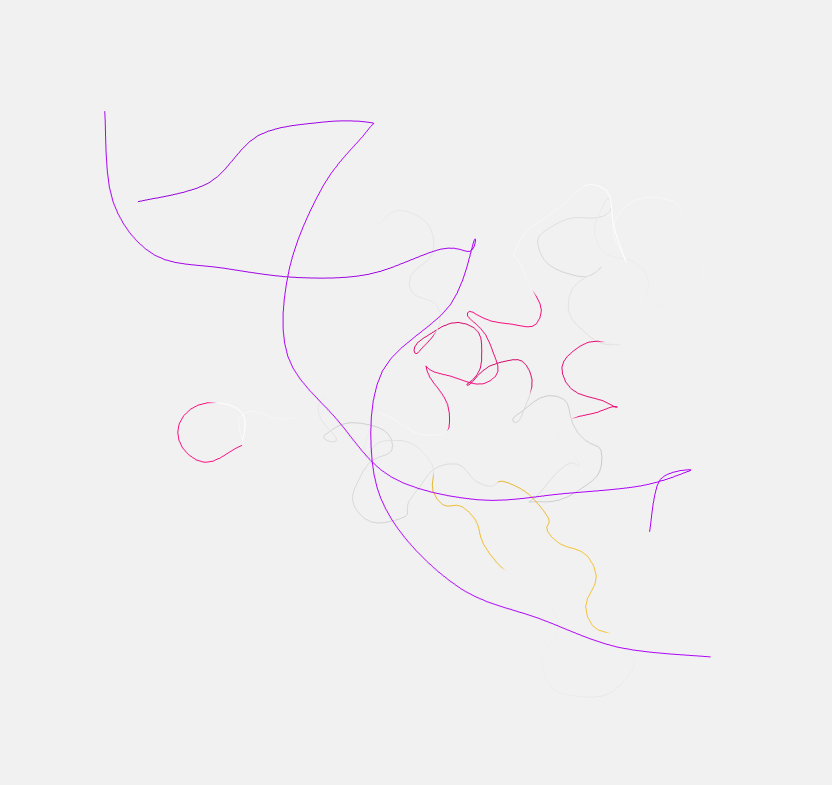
Trace
A flat, unshaded line is displayed along the main backbone trace.
Tube
Essentially like cartoon but with the aspectRatio fixed at a value of 1.0.
Due to a shortcoming of NGL Viewer, the cartoon and ribbon representations only can show four or more consecutive residues.
The Default representation can’t be edited but represents the structure in a standard way:
Backbone: Cartoon representation.
NA bases (if present): Base representation.
Heteroatoms: Ball and stick representation.
Ions: Ball and stick representation.
Waters: Ball and stick representation.
So take into account that if for example there is an heteroatom with ATOM instead of HETATM in the PDB file, it won’t be shown in this Default representation.
Radius

Through this slider, the radius can be modified in the next molecular representations:
Backbone
Ball and stick
Cartoon
Licorice
Spacefill
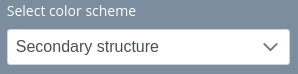
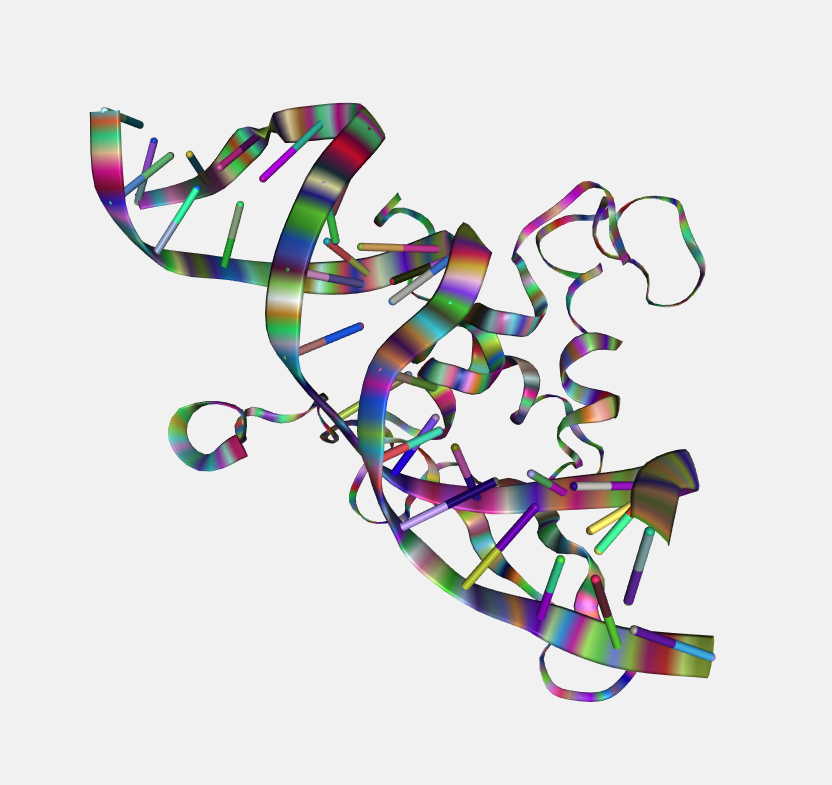
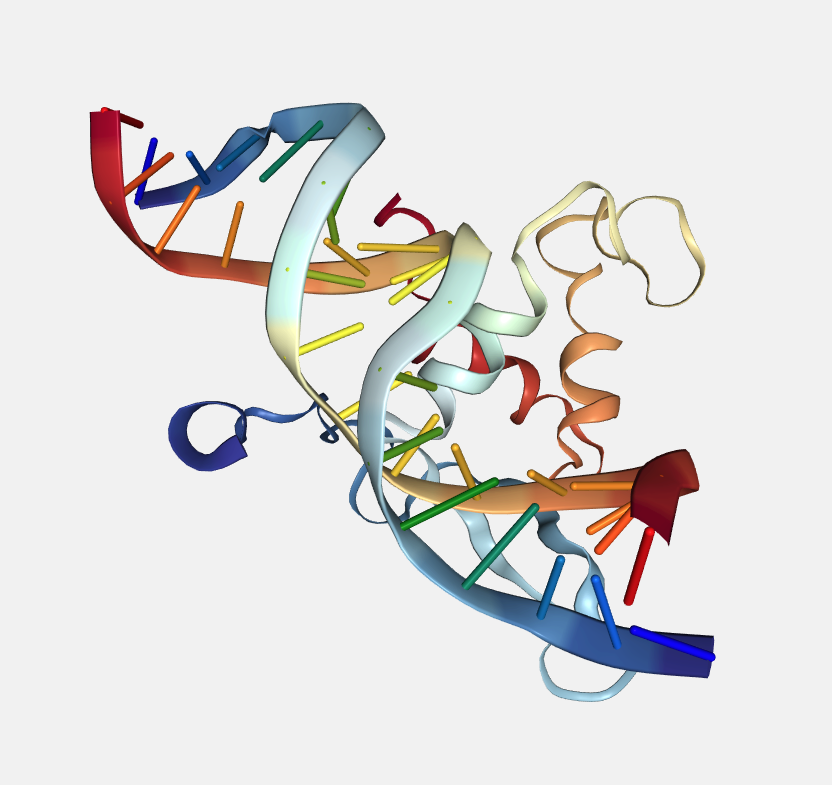
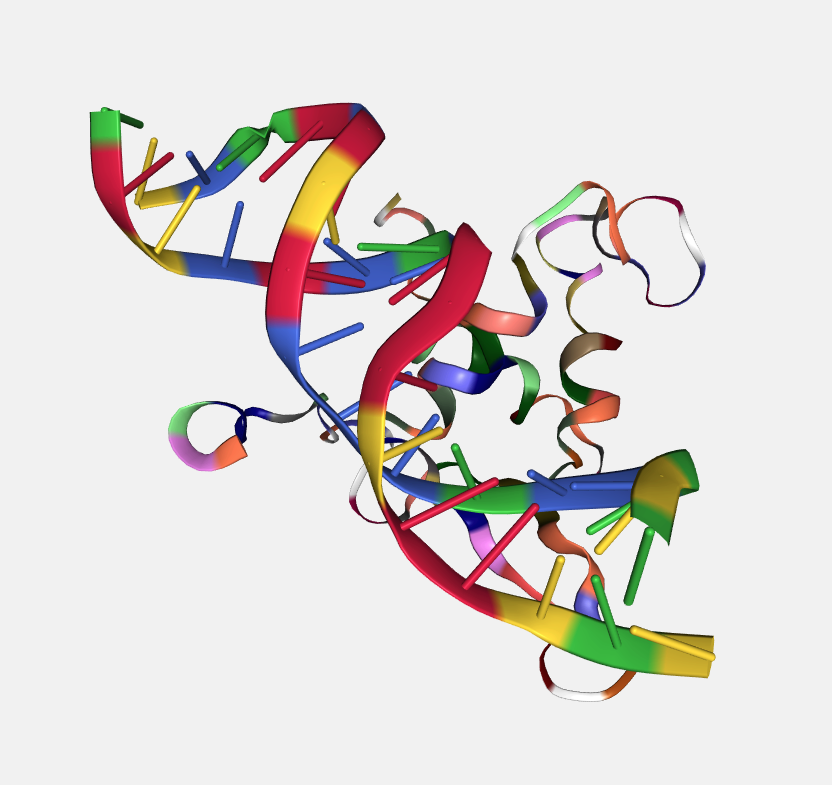
Color scheme
Each loaded structure can be displayed using a variety of color schemes:
Atom index
Color by atom index.
B-factor
Color by b-factor.
Chain id
Color by chain id.
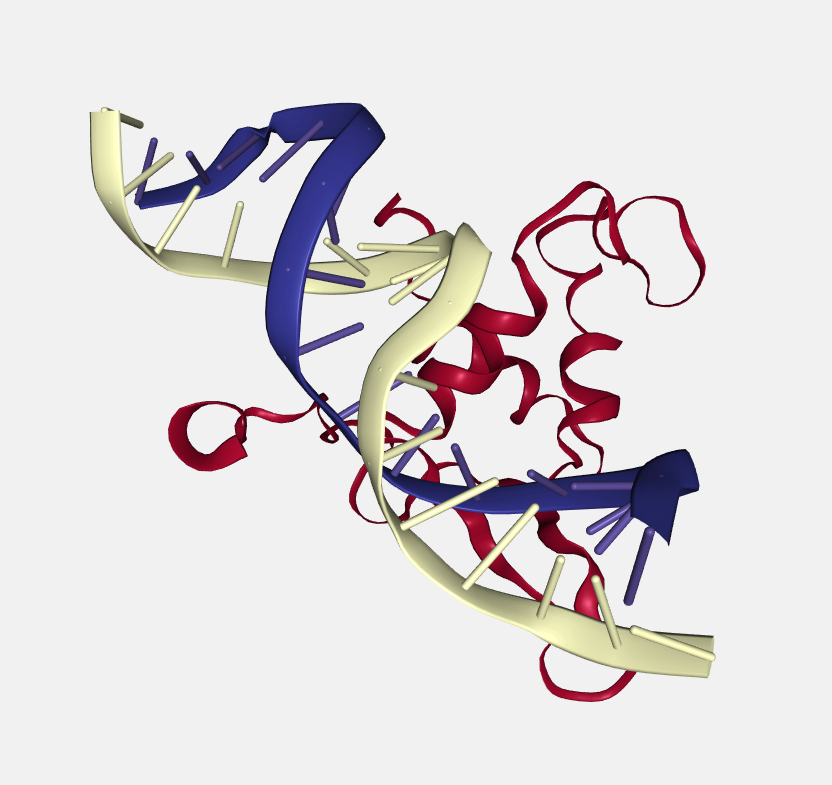
Chain index
Color by chain index.
Element
Color by chemical element.
Hydrophobicity
Color by hydrophobicity.

Model index
Color by model index.
Random
Class by random color.
Residue index
Color by residue index.
Residue name
Color by residue name.
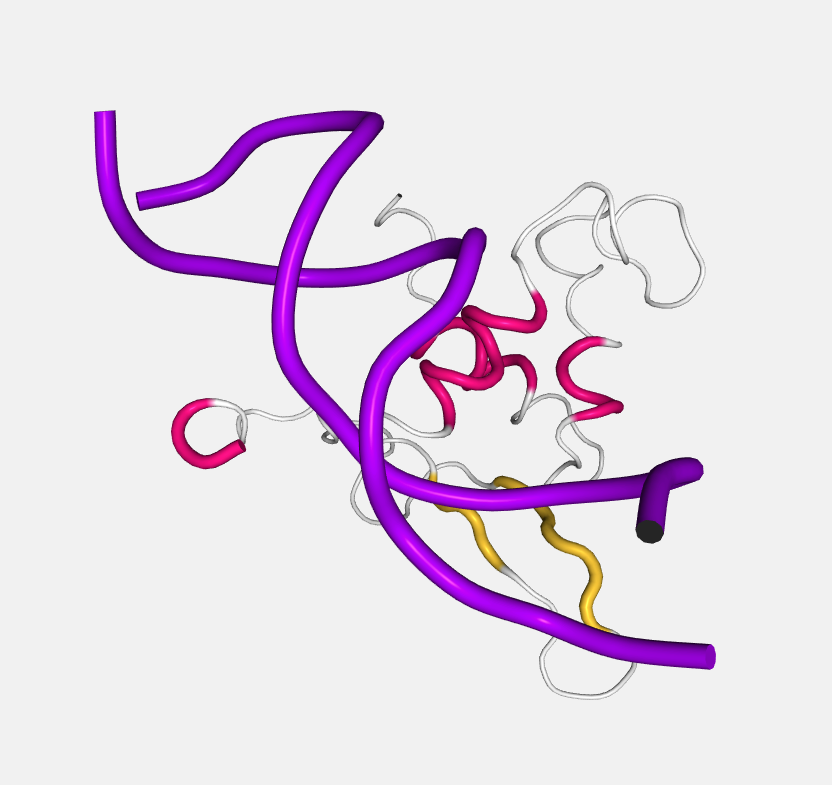
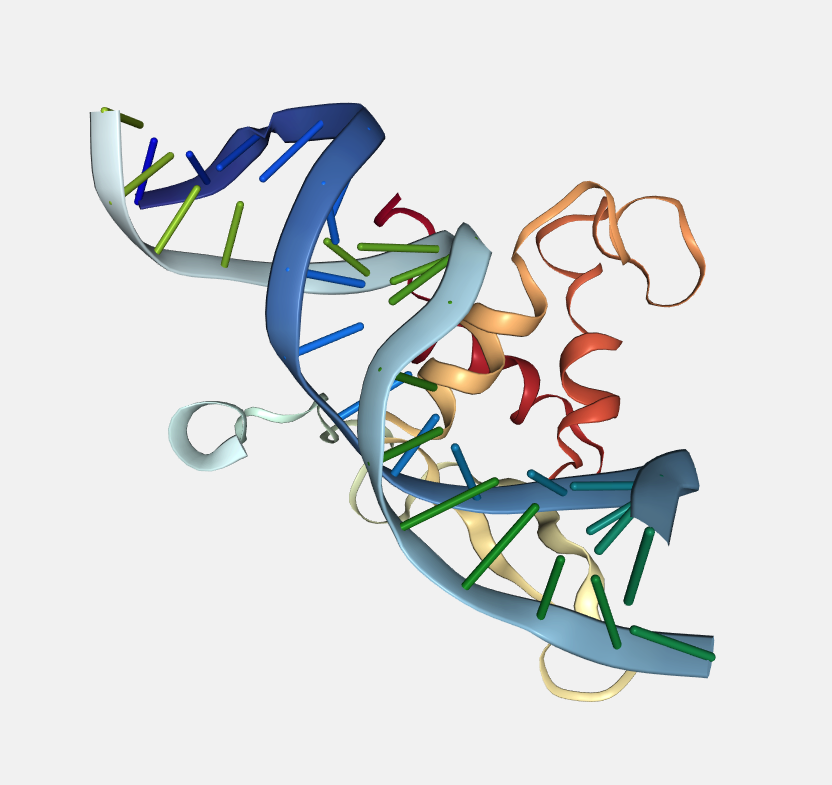
Secondary structure
Color by secondary structure.

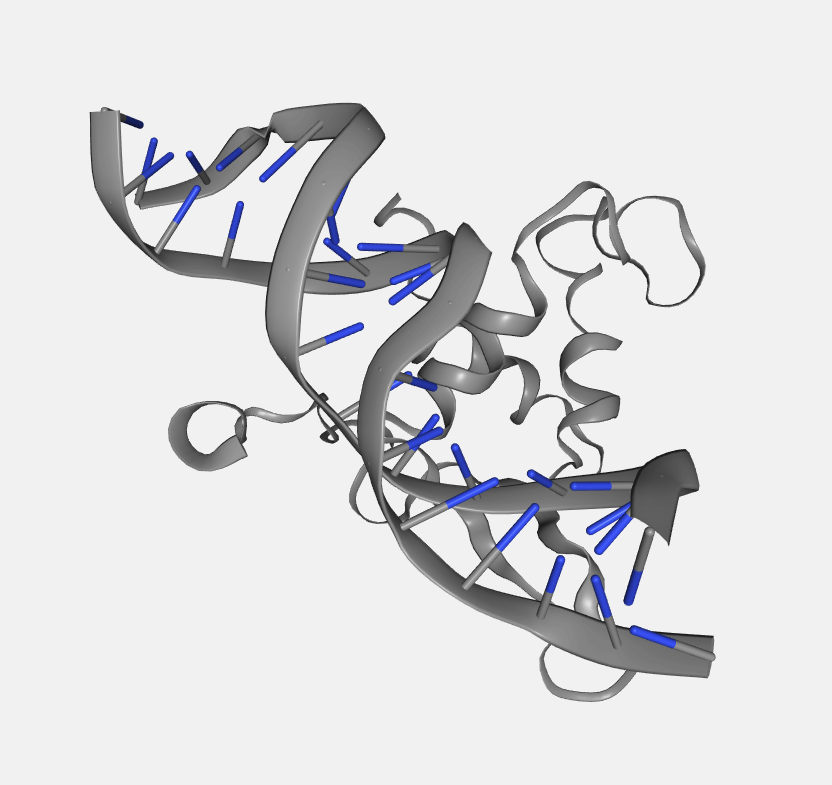
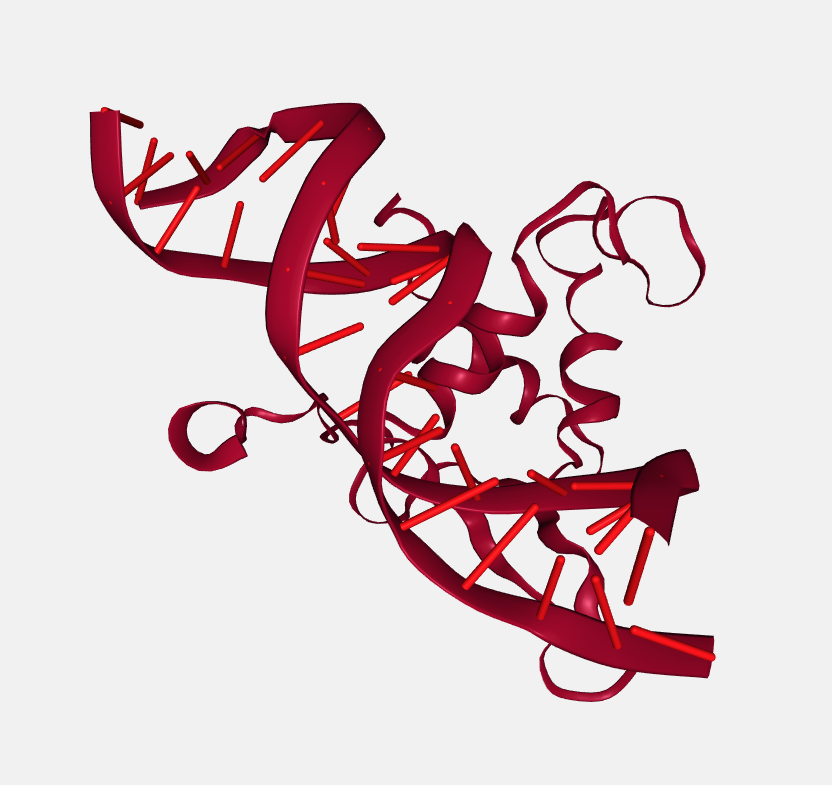
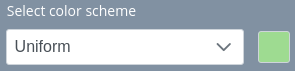
Uniform
Color by uniform color selected from the color picker that appears at right of the dropdown menu when this option is selected.
The colors for the Default representation are as follows:
Backbone: Secondary structure color scheme.
NA bases (if present): Residue name color scheme.
Heteroatoms: Element color scheme.
Ions: Element color scheme.
Waters: Element color scheme.
Opacity

Through this slider, the opacity of the representation varies. Note that due to an incompatibility of NGL Viewer, opacity in multilayer projects can generate some issues. So creating multiple representations with different degrees of opacity can give non desired outcomes.
Moreover, if the opacity of a representation is less than 30 it won’t be possible to select the residues from the stage. Due to a WebGL problem, the threshold for allowing selections from stage is set to greater than 30.
New representation
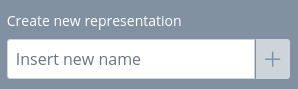
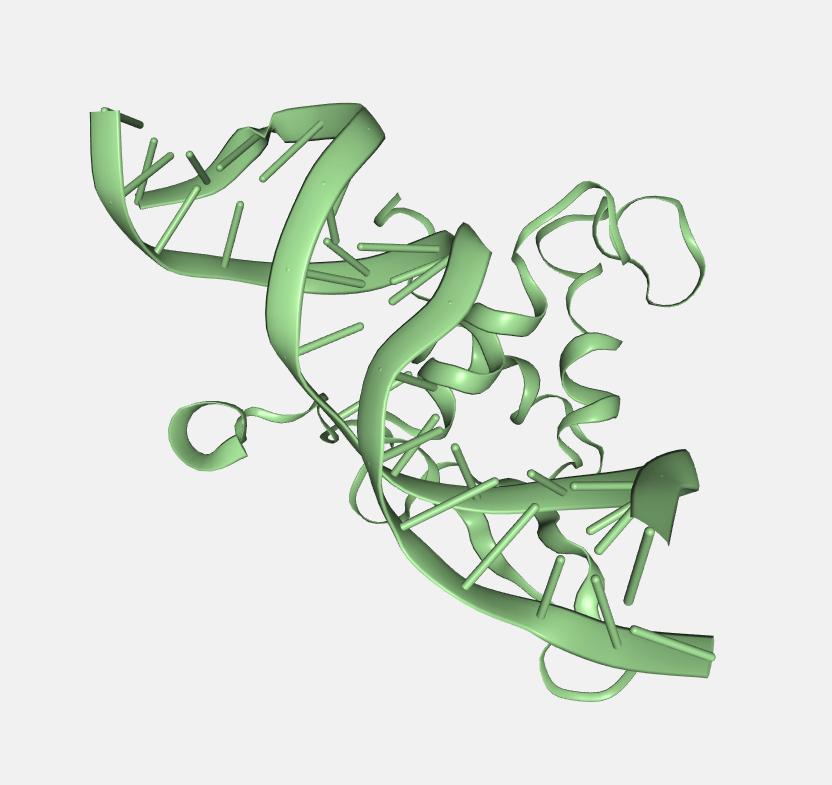
In this text box, users should insert the name for creating a new representation. For the sake to clearly see all the items that can be selected in the representation, initially a line representation will be shown (see image below). But at the moment that some molecule is selected, the rest of molecules will disappear from the stage. See next section for a more detailed description of this behavior.
Selections
The Selections panel is at the right side of the stage and is used for applying selections to the current representation selected in the Representations panel.
Note that if the current representation is the Default one, this panel will be disabled. Once users create a new representation, the Representations panel will open automatically though it can be closed clicking the open / close button.
When a new representation is created, all the items in the stage will be selected by default with a Line representation and Secondary structure color scheme. The meaning of this is to easily glimpse all the molecules contained in the representation. Once the first molecule (one of Sequence, Heteroatoms, Ions or Waters) is selected, this one will be the only one selected.
The Selections panel is divided into ten parts:
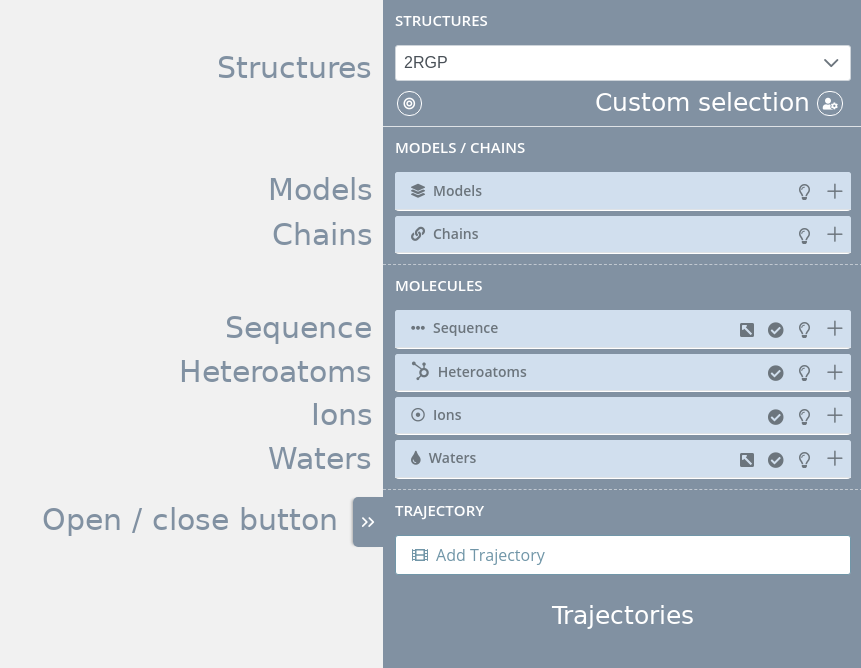
Open / close button

This button, located at the left part of the Selections panel, allows to open or close it.
In the default representation this feature is disabled.
Structures
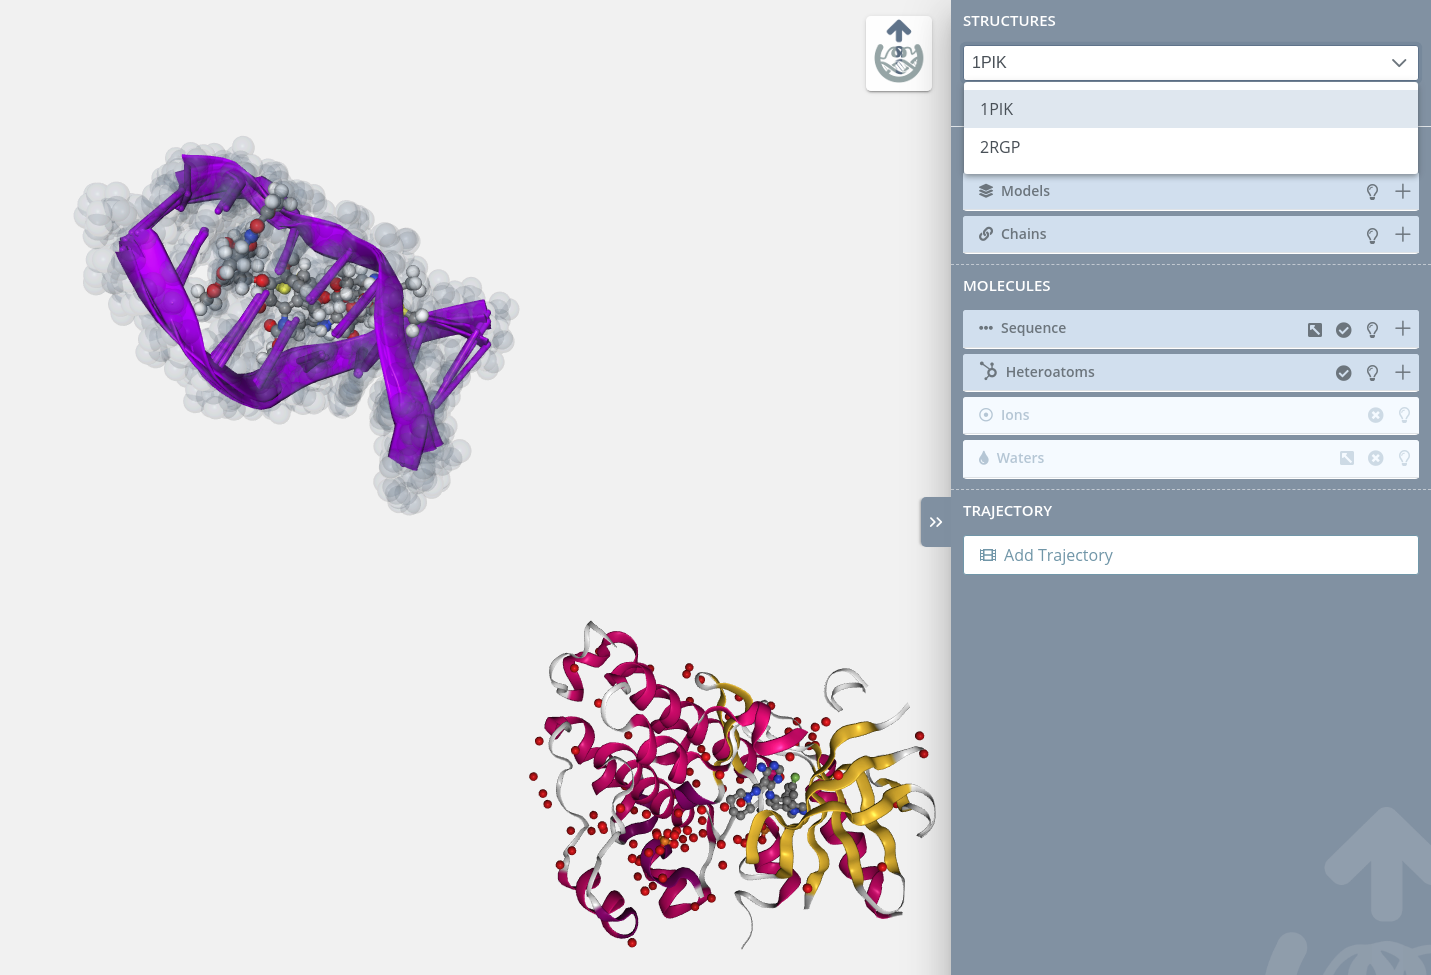
Select structure

In this dropdown menu, users can switch between the different structures uploaded in the Launch project page.
Opening the dropdown menu and passing the mouse over the structures contained on it will highlight them in the stage:
If there is only a single structure, this dropdown menu will be disabled:

Structures menu
Below the dropdown menu there are a couple of buttons:
Center structure

Centers the stage view in the currently selected structure. Note that if there is only a portion of the structure selected, the view will center around this portion.
Custom selection / Manual selection

As explained later on, advanced users can make custom selections using NGL viewer Selection Language. When custom selection is clicked, only this panel will be shown in the molecules part of the Structures panel. For coming back to the manual selection just click the same button again:

Custom selection
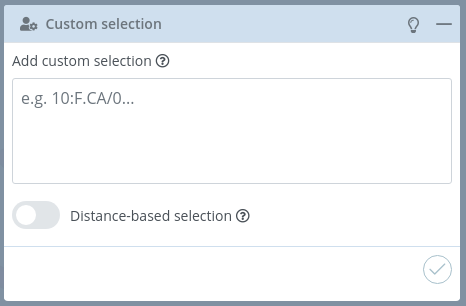
For accessing this section, the Custom selection button of the Structures menu must be clicked.
In this block, users can add a custom selection written in NGL viewer Selection Language. Please visit the Selection language section of the NGL Viewer manual before starting with this section.
There is a mini menu at the right side of the block header:
Show tips:
 opens a modal dialog with a short help for this section
Show / hide block:
 allows to open or collapse the panel.
Distance-based selection
If enabled, a selection of atoms that are within a certain distance of the selection will be given instead of the selection itself.
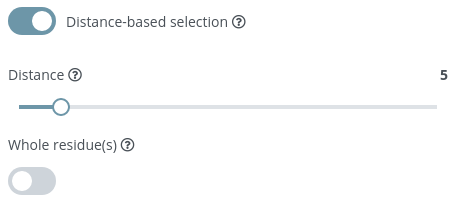
After enabling this option, two new parameters are shown:
Distance
Distance from selection in Ångstroms.
Whole residue(s)
Whether to select or not the whole residue from the selected atoms.
Two actions can be performed after writing the custom selection:
Save

Clicking this button the custom selection is added to the current representation.
Remove

Clicking this button the custom selection is removed from the current representation.
Note that custom selection is not compatible with manual selection, so even though the selections made in the manual selection section will not be removed, they won’t be visible in the stage. If users want to restore a previously made manual selection, just removing the custom selection will do the trick.
Models
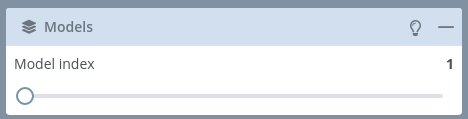
If the selected structure has more than one model, this block will be enabled allowing users to switch between the different models of the structure.
Same heteroatom in different models represented in three different colors:

There is a mini menu at the right side of the block header:
Show tips:
opens a modal dialog with a short help for this sectionShow / hide block:
allows to open or collapse the panel.
Note that switching between models will change the succeeding panels (i.e. if the Model 1 has two chains A and B and the Model 2 has three chains A, B and C, the Chains block will change).
If there is only a single model, this block menu will be disabled:

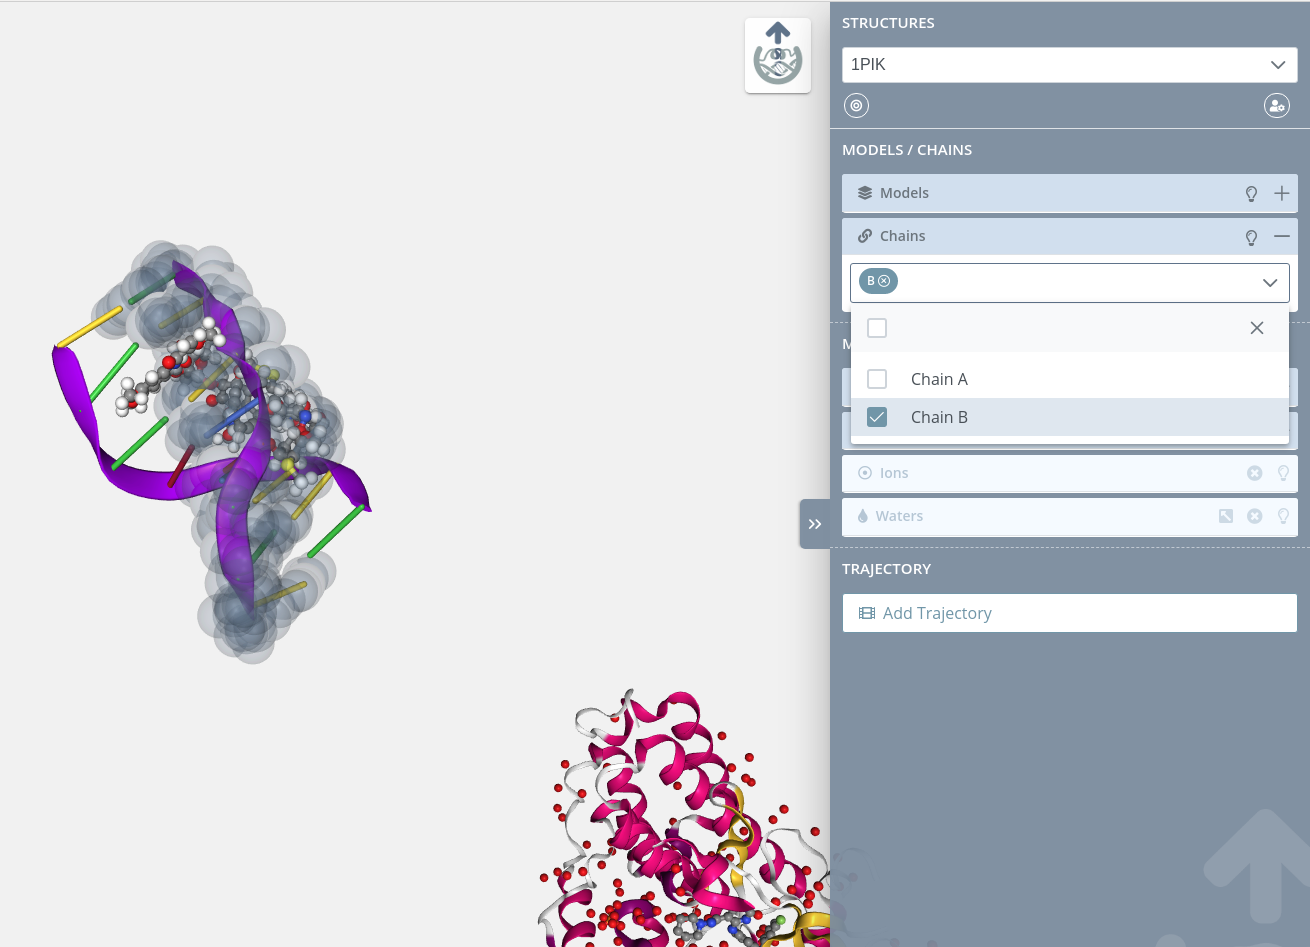
Chains
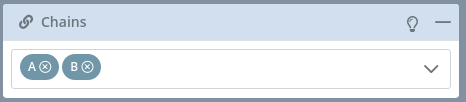
If the selected model of the current structure has more than one chain, this block will be enabled allowing users to switch between the different models of the structure.
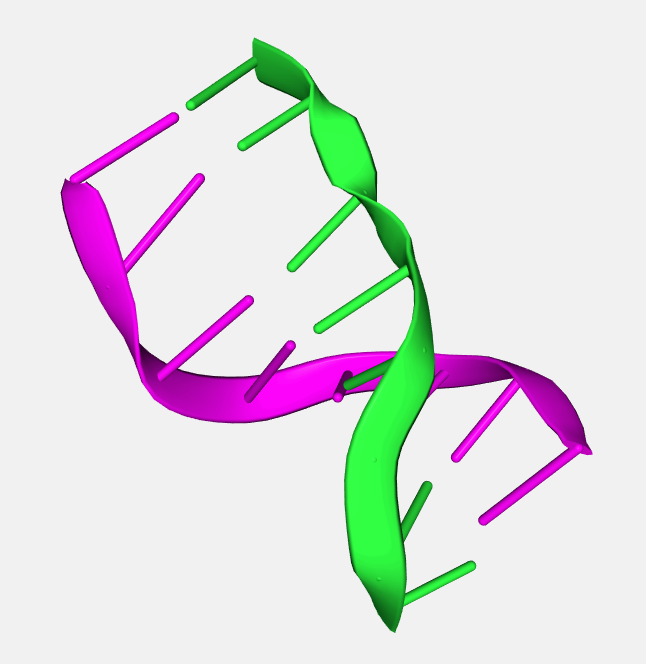
Two different chains represented in two different colors:
There is a mini menu at the right side of the block header:
Show tips:
opens a modal dialog with a short help for this sectionShow / hide block:
allows to open or collapse the panel.
Opening the dropdown menu and passing the mouse over the chains contained on it will highlight them in the stage:
Note that if the structure has no chains, all the molecules will be automatically assigned to the Chain A. If the structure has one or more chains but some of its molecules have no chain, these “orphan” molecules will be assigned to a mock Chain @.
If there is only a single chain, this block menu will be disabled:

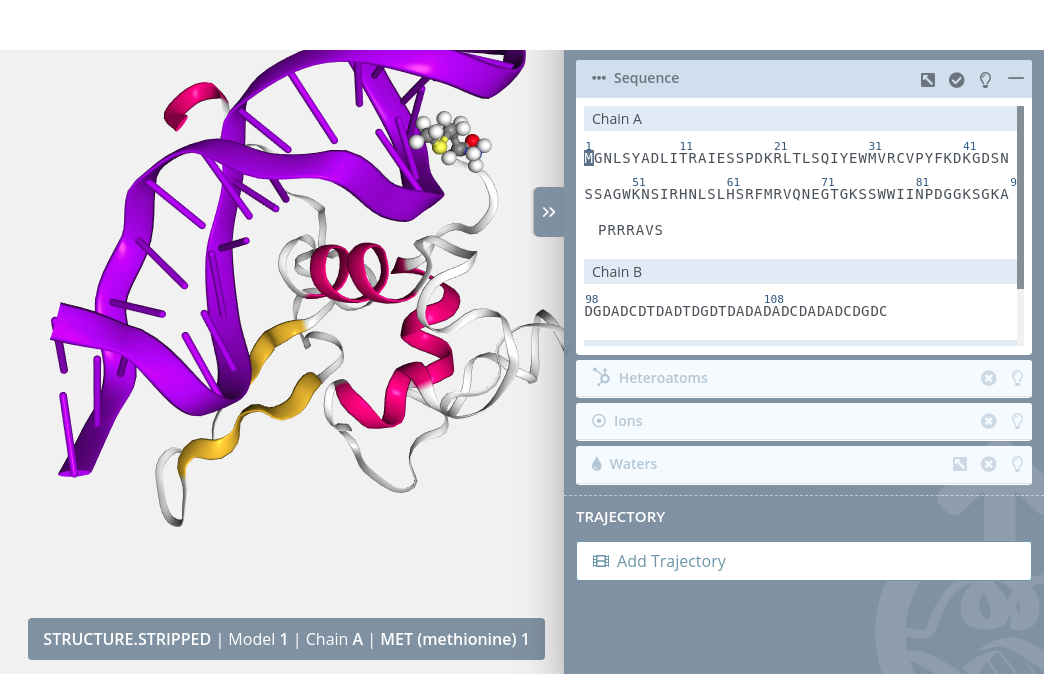
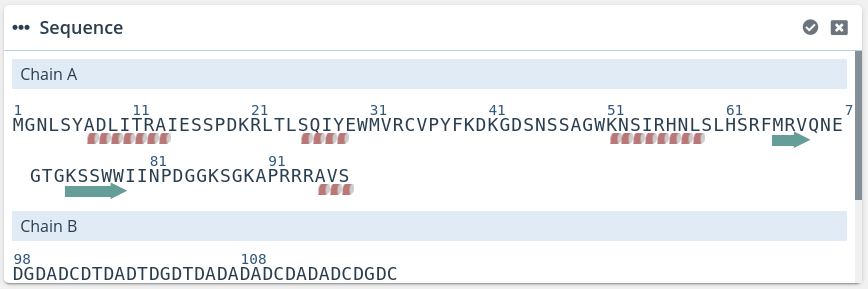
Sequence
There are two ways to perform sequence residues selection: directly through the block in the Selection panel or though the Zoom window:
Selection panel block
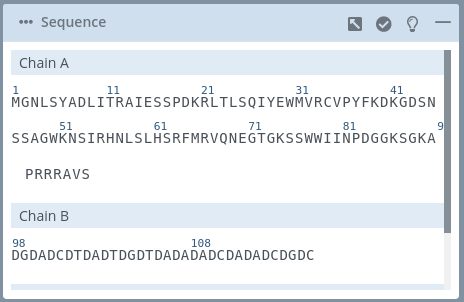
This block shows all the residues of the structure classified by chains.
There is a mini menu at the right side of the block header:
Open / close external window:
 allows to open or close the Zoom window for this section.
Select / unselect all:
 allows to select or unselect all the molecules of this block with a single click.
Show tips:
opens a modal dialog with a short help for this sectionShow / hide block:
allows to open or collapse the panel.
Different actions can be performed with the residues:
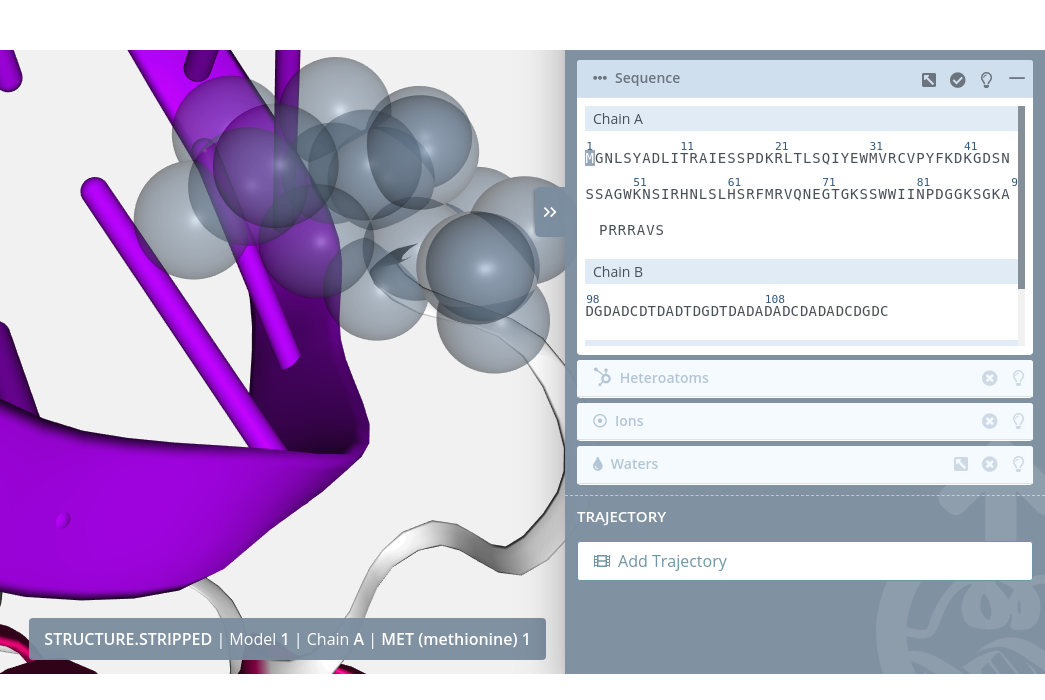
Highlight
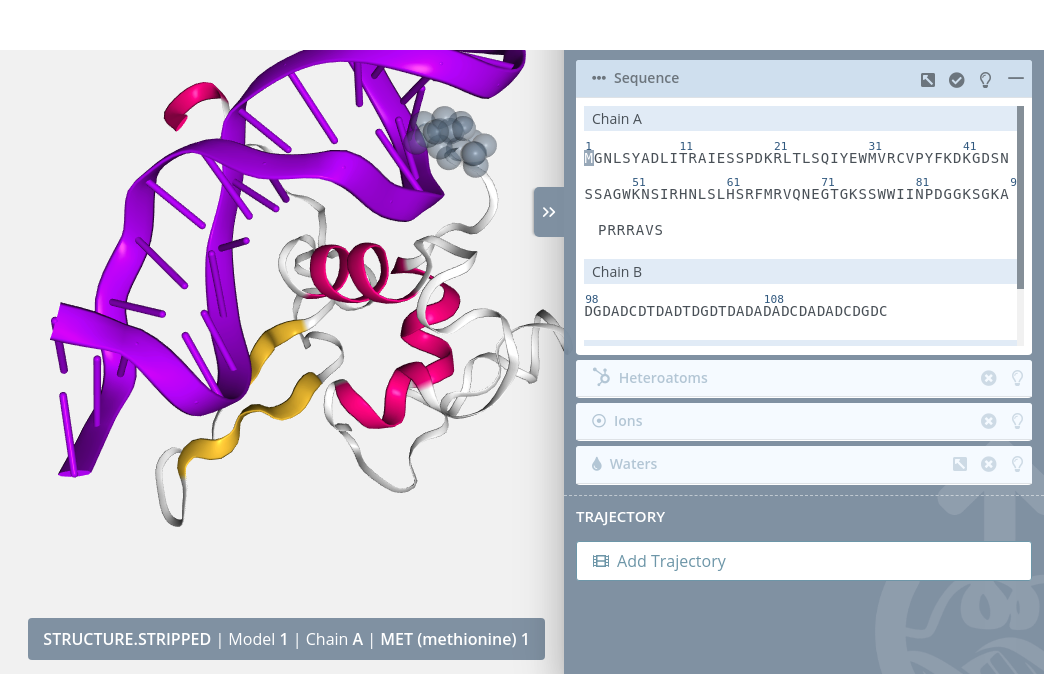
Passing the mouse over a residue will highlight it on the stage:
Selection
Clicking on a residue will select it in the current selection applying to it the molecular representation, radius, color scheme and opacity selected in the representations panel for the current representation:
Unselection
Clicking on a selected residue will unselect it from the current selection.
Zoom
Clicking on a residue with the mouse left button while pressing the Alt key will do a zoom to the residue:
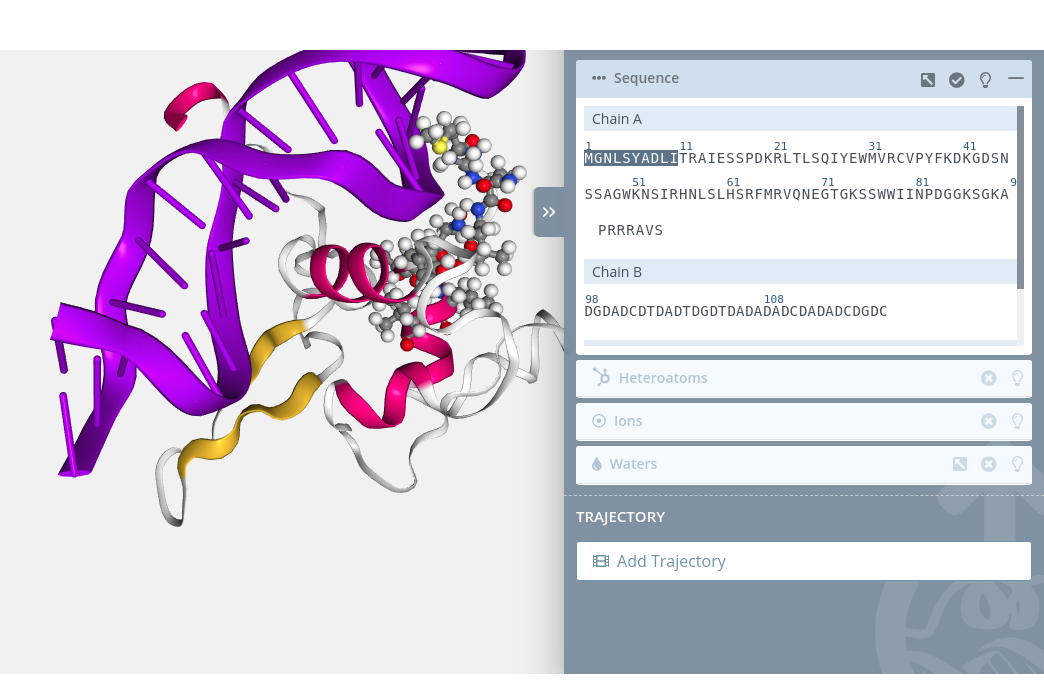
Multiple selection
For selecting multiple residues just click the first residue of the custom sequence with the mouse left button while pressing the Shift key. A small cross will be shown next to the mouse pointer:

Then, click the last residue of the custom sequence again with the mouse left button while pressing the Shift key:
Multiple unselection
For unselecting multiple residues is exactly the same process: just click the first residue of the custom sequence with the mouse left button while pressing the Shift key. A small cross will be shown next to the mouse pointer:
Then, click the last residue of the custom sequence again with the mouse left button while pressing the Shift key.
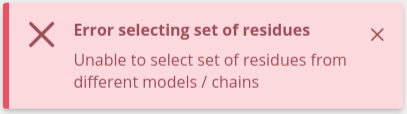
Note that multiple selections are only allowed between residues of the same Model and Chain. Trying to select multiple residues from different Model and / or Chain will show an error notification:
If there are no residues in the selected structure (i.e. an heteroatom), this block menu will be disabled:

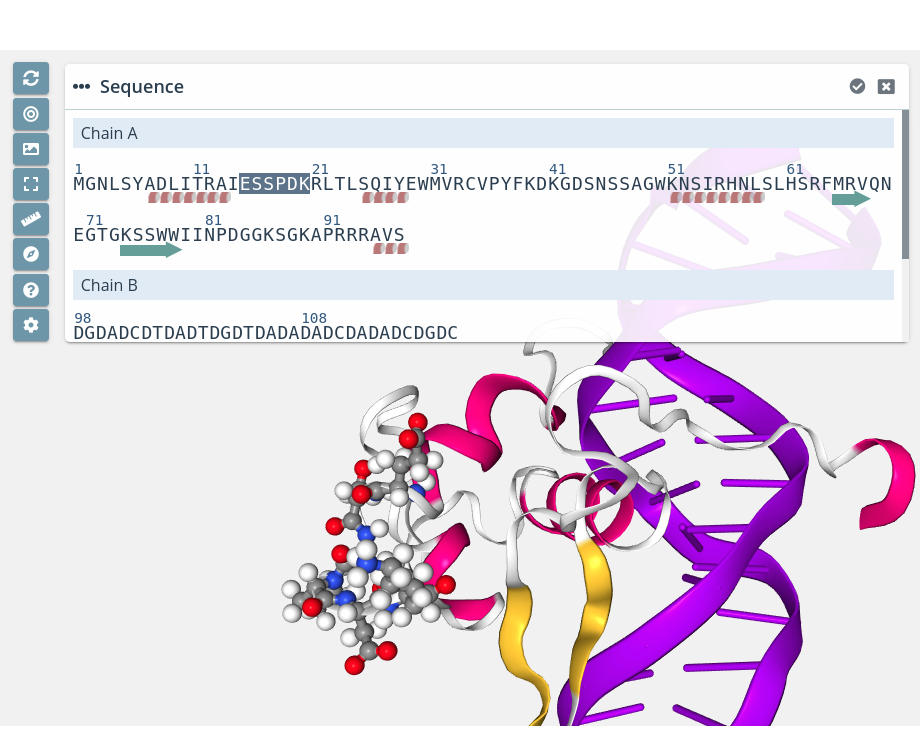
Zoom window
This window shows the same information of the Sequences block but in a little more detail, adding the ability of selecting α-helices and β-sheets if they are present in the structure.
There is a mini menu at the right side of the window:
Select / unselect all:
 allows to select or unselect all the molecules of this block with a single click.
Close window:
 closes the window.
Different actions can be performed with the residues:
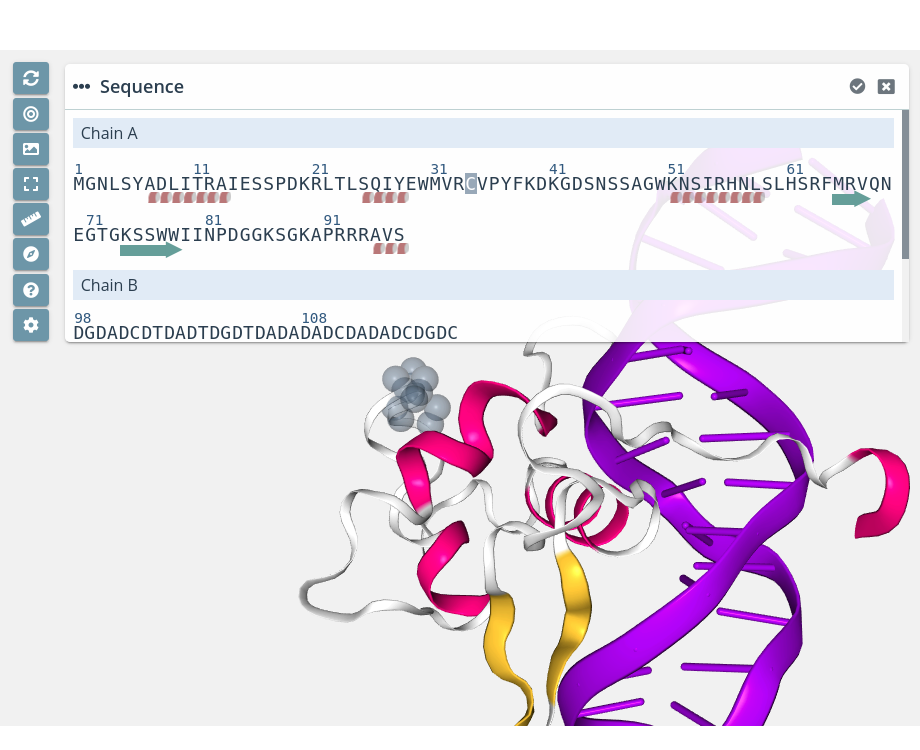
Residue highlight
Passing the mouse over a residue will highlight it in the stage:
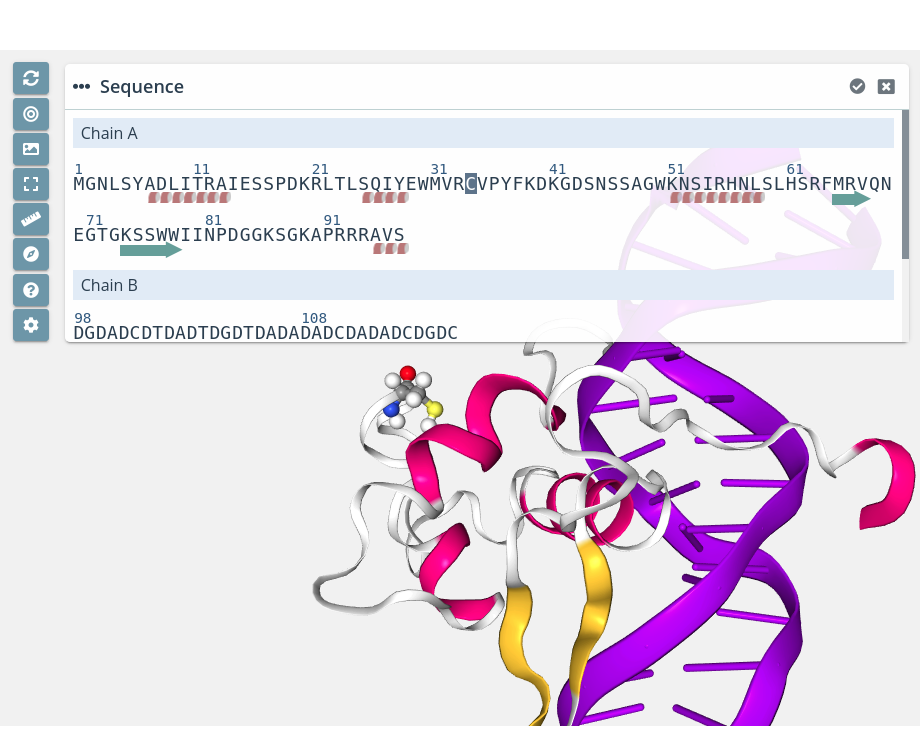
Residue selection
Clicking on a residue will select it in the current selection applying to it the molecular representation, radius, color scheme and opacity selected in the representations panel for the current representation:
Residue unselection
Clicking on a selected residue will unselect it from the current selection.
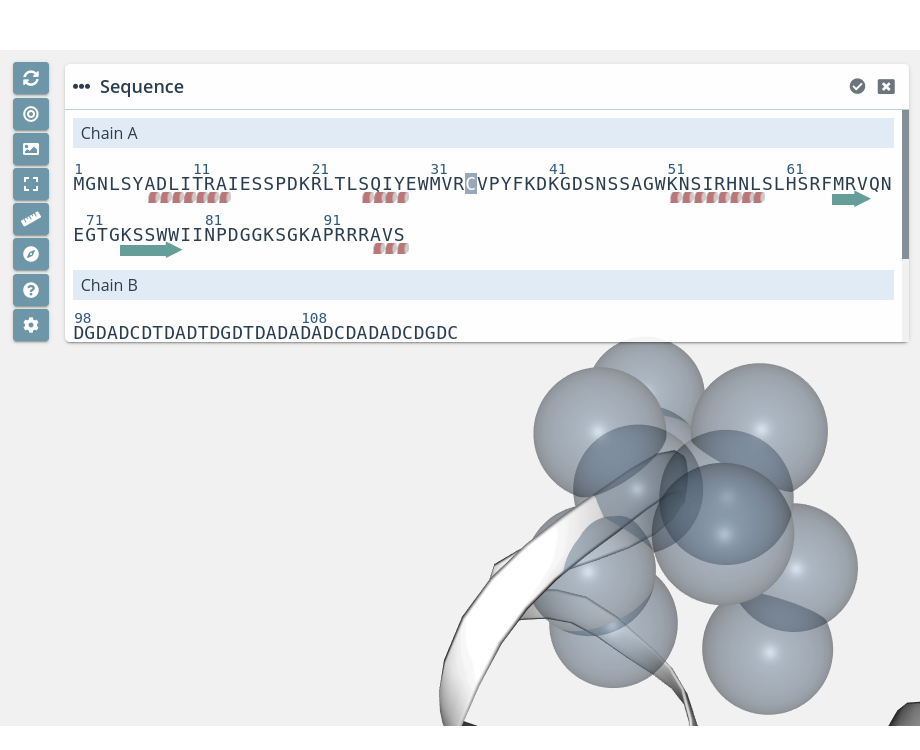
Residue zoom
Clicking on a residue with the mouse left button while pressing the Alt key will do a zoom to the residue:
Multiple residue selection
For selecting multiple residues just click the first residue of the custom sequence with the mouse left button while pressing the Shift key. A small cross will be shown next to the mouse pointer:
Then, click the last residue of the custom sequence again with the mouse left button while pressing the Shift key:
Multiple residue unselection
For unselecting multiple residues is exactly the same process: just click the first residue of the custom sequence with the mouse left button while pressing the Shift key. A small cross will be shown next to the mouse pointer:
Then, click the last residue of the custom sequence again with the mouse left button while pressing the Shift key.
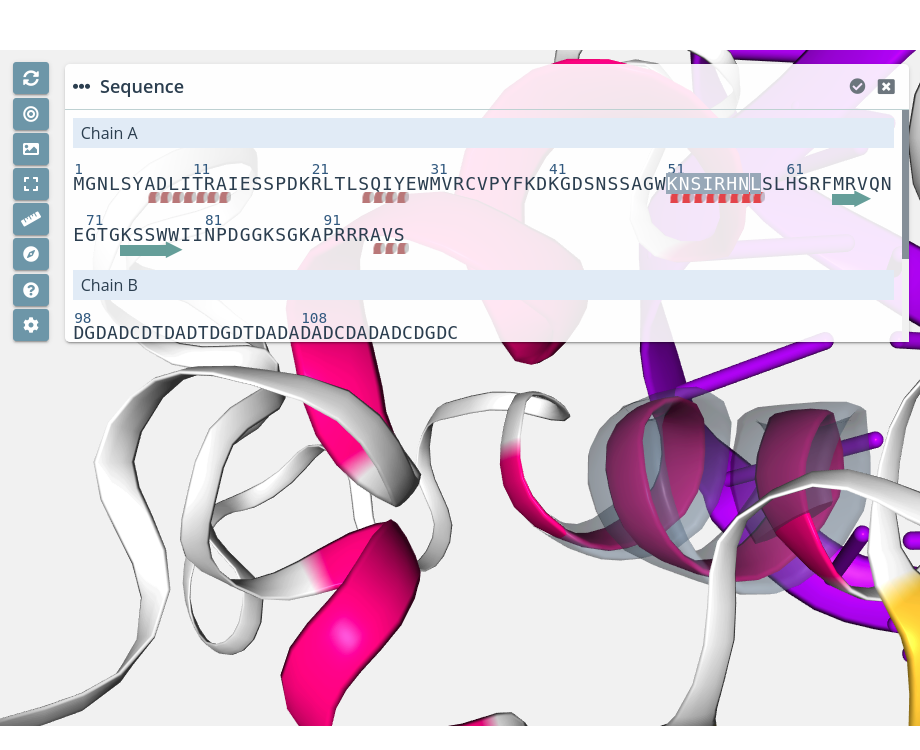
α-helix / β-sheet highlight
Passing the mouse over an α-helix or a β-sheet will highlight it in the stage:
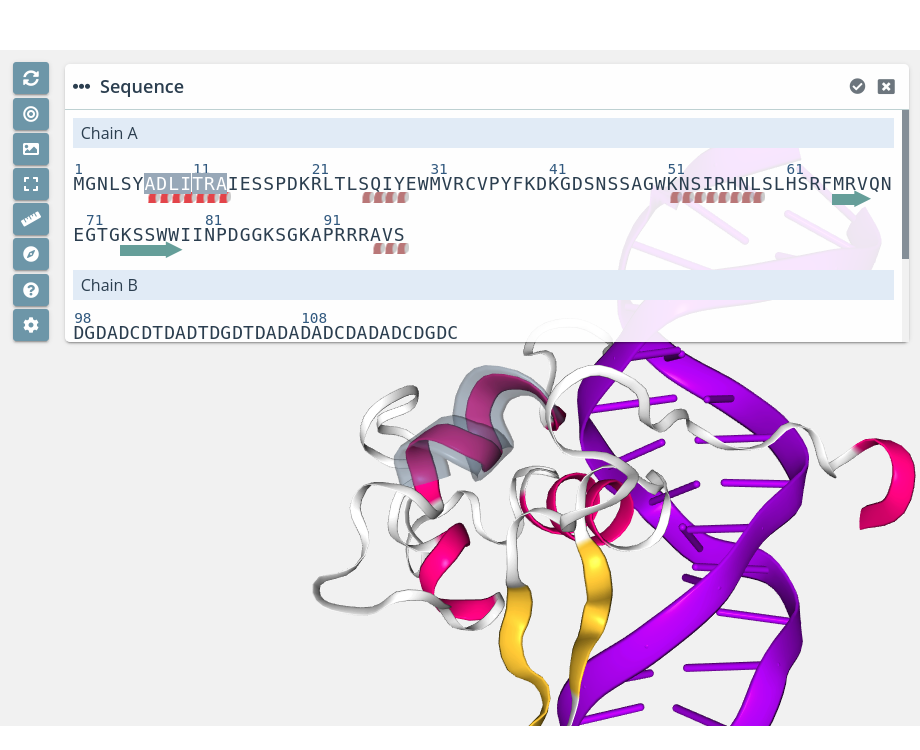
α-helix / β-sheet selection
Clicking on a α-helix or a β-sheet will select it in the current selection applying to it the molecular representation, radius, color scheme and opacity selected in the representations panel for the current representation:

α-helix / β-sheet unselection
Clicking on a selected α-helix or a β-sheet will unselect it from the current selection. Note that to unselect a whole α-helix or β-sheet all its residues must be selected.
α-helix / β-sheet zoom
Clicking on a α-helix or a β-sheet with the mouse left button while pressing the Alt key will do a zoom to the ensemble of residues:
Note that multiple selections are only allowed between residues of the same Model and Chain. Trying to select multiple residues from different Model and / or Chain will show an error notification:
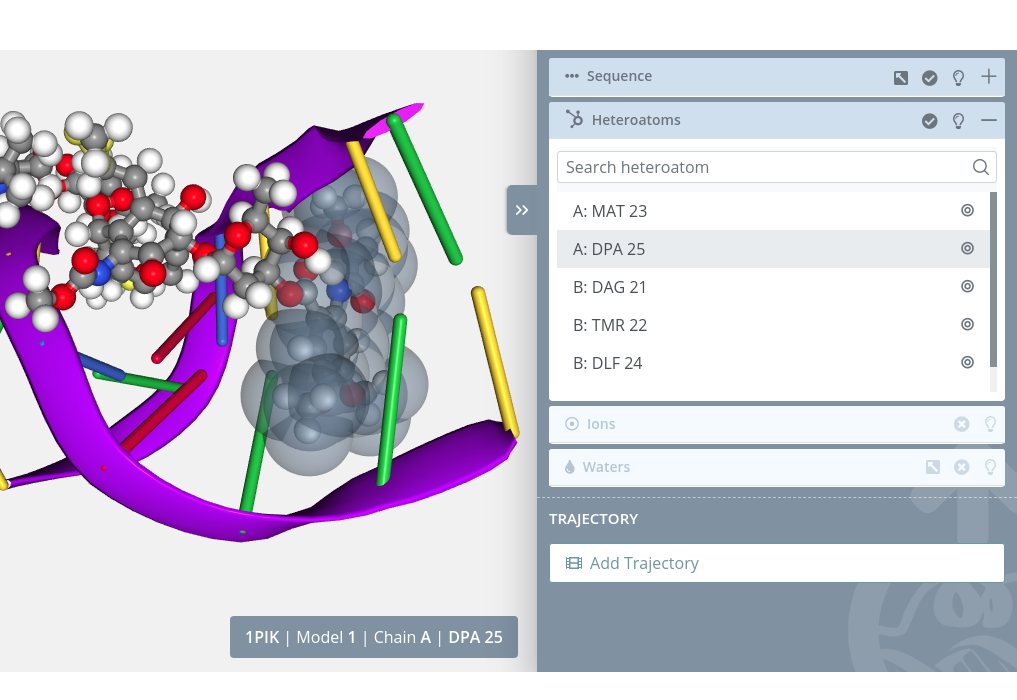
Heteroatoms
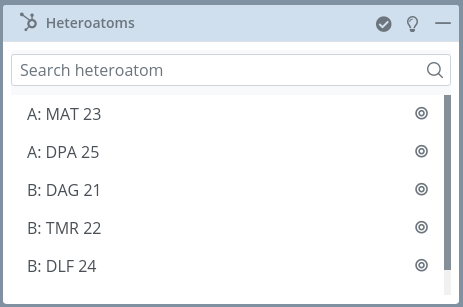
This block shows all the heteroatoms of the structure.
There is a mini menu at the right side of the block header:
Select / unselect all:
allows to select or unselect all the molecules of this block with a single click.Show tips:
opens a modal dialog with a short help for this sectionShow / hide block:
allows to open or collapse the panel.
There is a search box on the top of the heteroatoms list that allows users to perform searches on this list.
Different actions can be performed with the heteroatoms:
Highlight
Passing the mouse over an heteroatom will highlight it in the stage:
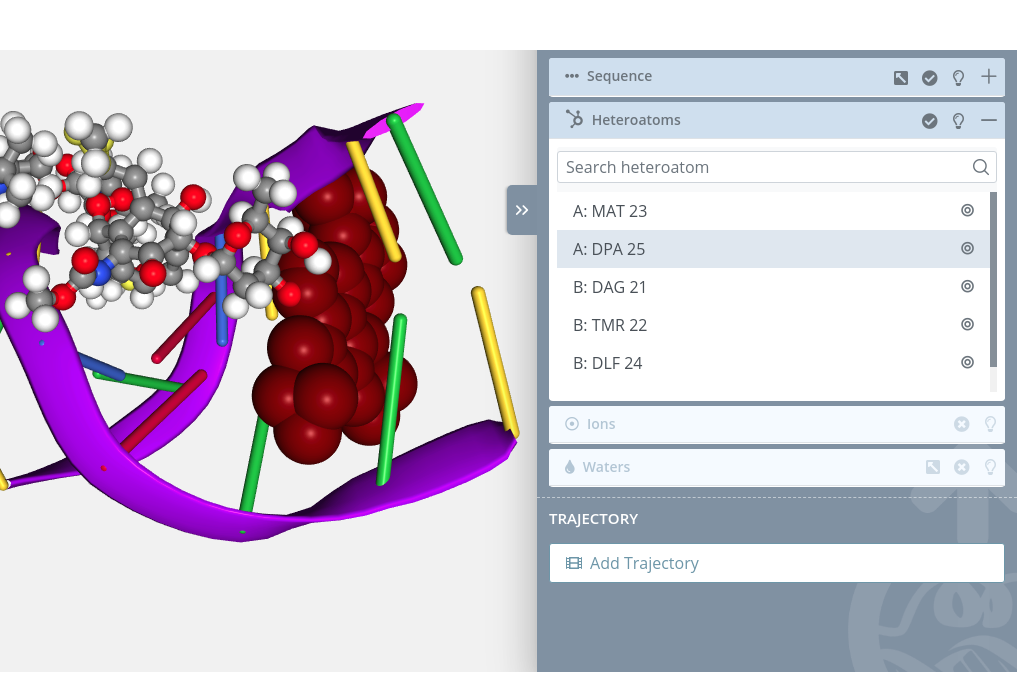
Selection
Clicking on an heteroatom will select it in the current selection applying to it the molecular representation, radius, color scheme and opacity selected in the representations panel for the current representation:
Unselection
Clicking on a selected heteroatom will unselect it from the current selection.
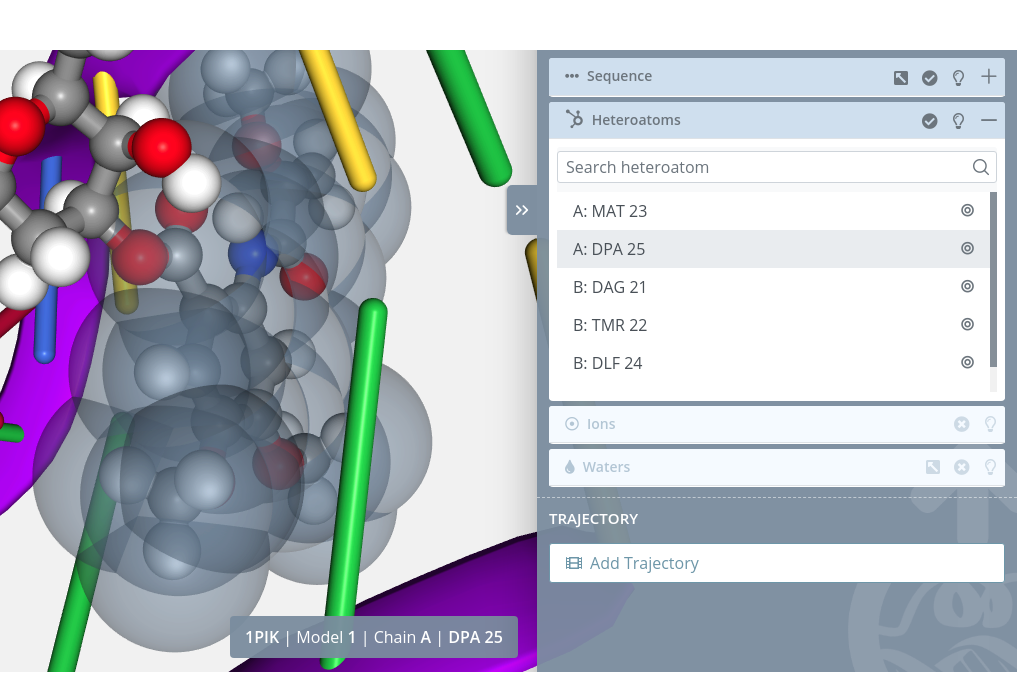
Zoom
Clicking on the Center button  of each heteroatom will do a zoom on it:
If there are no heteroatoms in the selected structure, this block menu will be disabled:

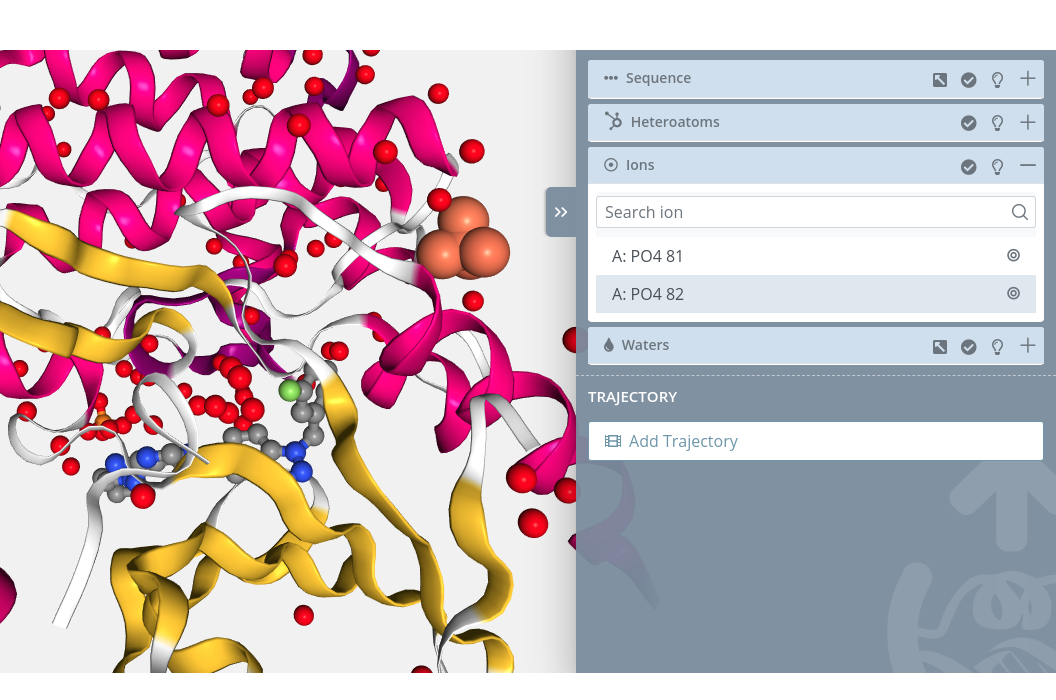
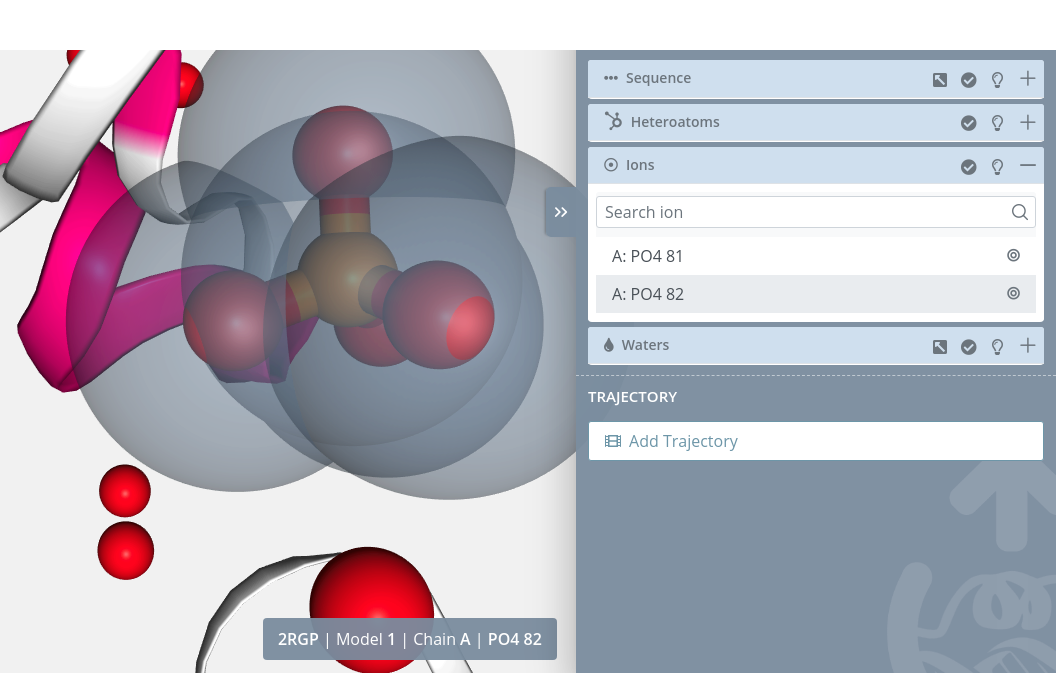
Ions

This block shows all the ions of the structure.
There is a mini menu at the right side of the block header:
Select / unselect all:
allows to select or unselect all the molecules of this block with a single click.Show tips:
opens a modal dialog with a short help for this sectionShow / hide block:
allows to open or collapse the panel.
There is a search box on the top of the ions list that allows users to perform searches on this list.
Different actions can be performed with the ions:
Highlight
Passing the mouse over an ion will highlight it in the stage:

Selection
Clicking on an ion will select it in the current selection applying to it the molecular representation, radius, color scheme and opacity selected in the representations panel for the current representation:
Unselection
Clicking on a selected ion will unselect it from the current selection.
Zoom
Clicking on the Center button of each ion will do a zoom on it:
If there are no ions in the selected structure, this block menu will be disabled:

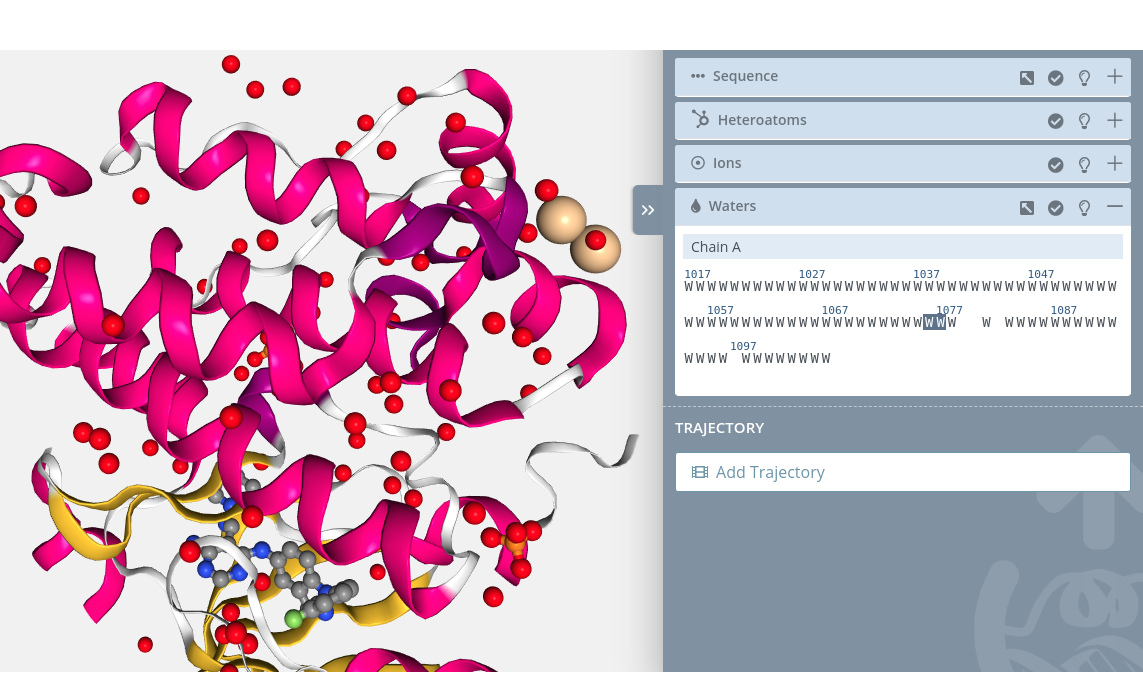
Waters
There are two ways to perform sequence waters selection: directly through the block in the Selection panel or though the Zoom window:
Selection panel block
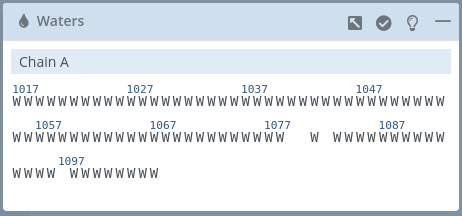
This block shows all the waters of the structure classified by chains.
There is a mini menu at the right side of the block header:
Open / close external window:
allows to open or close the Zoom window for this section.Select / unselect all:
allows to select or unselect all the molecules of this block with a single click.Show tips:
opens a modal dialog with a short help for this sectionShow / hide block:
allows to open or collapse the panel.
Different actions can be performed with the water molecules:
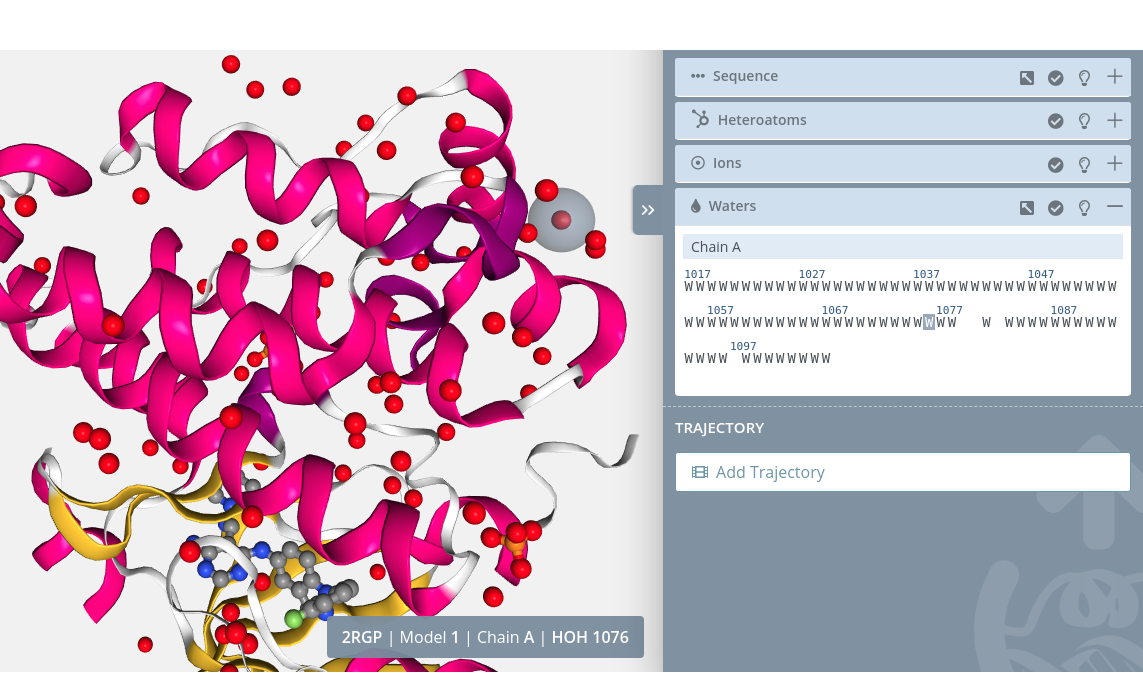
Highlight
Passing the mouse over a water molecule will highlight it on the stage:
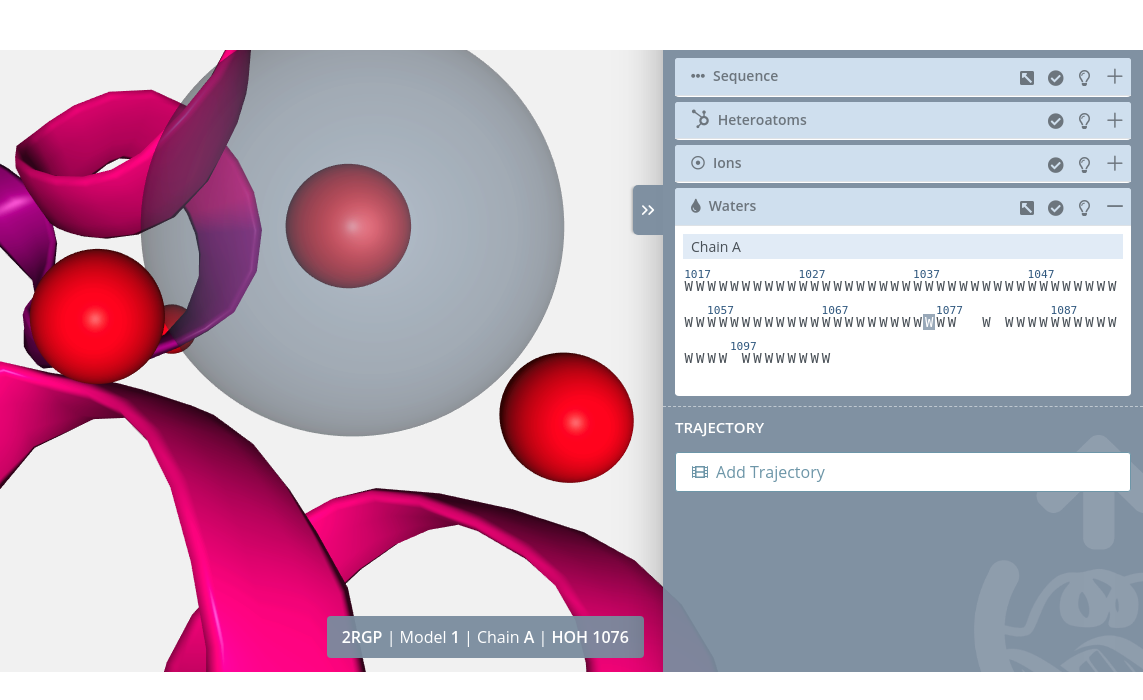
Selection
Clicking on a water molecule will select it in the current selection applying to it the molecular representation, radius, color scheme and opacity selected in the representations panel for the current representation:

Unselection
Clicking on a selected water molecule will unselect it from the current selection.
Zoom
Clicking on a water molecule with the mouse left button while pressing the Alt key will do a zoom to the water molecule:
Multiple selection
For selecting multiple water molecules just click the first water molecule of the custom sequence with the mouse left button while pressing the Shift key. A small cross will be shown next to the mouse pointer:
Then, click the last water molecule of the custom sequence again with the mouse left button while pressing the Shift key:
Multiple unselection
For unselecting multiple water molecules is exactly the same process: just click the first water molecule of the custom sequence with the mouse left button while pressing the Shift key. A small cross will be shown next to the mouse pointer:
Then, click the last water molecule of the custom sequence again with the mouse left button while pressing the Shift key.
Note that multiple selections are only allowed between water molecules of the same Model and Chain. Trying to select multiple water molecules from different Model and / or Chain will show an error notification:
If there are no water molecules in the selected structure, this block menu will be disabled:

Zoom window
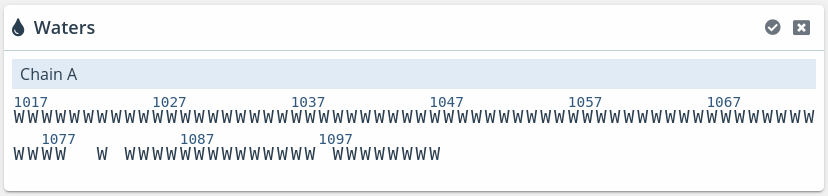
This window shows the same information of the Waters block but in a little more detail.
There is a mini menu at the right side of the window:
Select / unselect all:
allows to select or unselect all the molecules of this block with a single click.Close window:
closes the window.
The actions that can be performed are the same that in the Waters block:
Highlight
Passing the mouse over a water molecule will highlight it on the stage:
Selection
Clicking on a water molecule will select it in the current selection applying to it the molecular representation, radius, color scheme and opacity selected in the representations panel for the current representation:
Unselection
Clicking on a selected water molecule will unselect it from the current selection.
Zoom
Clicking on a water molecule with the mouse left button while pressing the Alt key will do a zoom to the water molecule:
Multiple selection
For selecting multiple water molecules just click the first water molecule of the custom sequence with the mouse left button while pressing the Shift key. A small cross will be shown next to the mouse pointer:
Then, click the last water molecule of the custom sequence again with the mouse left button while pressing the Shift key:
Multiple unselection
For unselecting multiple water molecules is exactly the same process: just click the first water molecule of the custom sequence with the mouse left button while pressing the Shift key. A small cross will be shown next to the mouse pointer:
Then, click the last water molecule of the custom sequence again with the mouse left button while pressing the Shift key.
Note that multiple selections are only allowed between water molecules of the same Model and Chain. Trying to select multiple water molecules from different Model and / or Chain will show an error notification:
Trajectories
Each structure can be linked to a trajectory. In this section, initially there is a button that opens a modal window for uploading this trajectory associated with the structure.
Add trajectory
Clicking the button Add trajectory will open the modal window for uploading a trajectory:

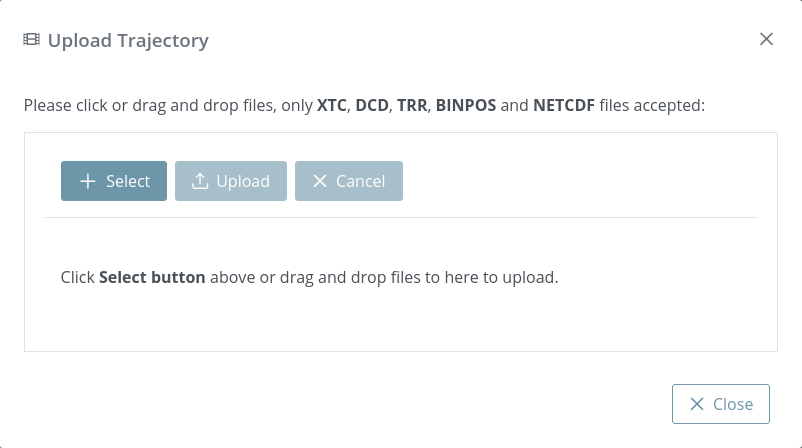
This modal window allows uploading a single trajectory. Note that depending on the file size, the process may take a while. After uploading it to the server it will be processed through MDsrv.
As explained in the introduction, in the backend of this web application is running MDsrv, a powerful tool for viewing and sharing molecular dynamics simulations on the web. So once a trajectory is uploaded, MDsrv processes it in order to stream it frame by frame.
For further information about MDsrv, please visit the official website or the Nature Methods paper.
In the current version, only XTC, DCD, TRR, BINPOS and NETCDF (.netcdf / .nc) formats are accepted and the maximum file size is 500MB.
Player

Once the trajectory has been uploaded and processed in the backend, it can be played through the trajectory player. In this player, trajectories can be played, paused or played manually either frame by frame or dragging the slider.
Settings
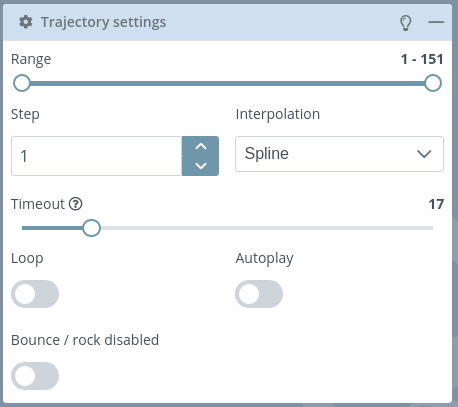
This block allows users to modify the trajectory settings.
There is a mini menu at the right side of the block header:
Show tips:
opens a modal dialog with a short help for this sectionShow / hide block:
allows to open or collapse the panel.
Different trajectory properties can be updated:
Range: initially set from the first to the last frame of the trajectory, defines a range of frames with which the trajectory will be played.
Step: defines the number of frames between playing steps.
Interpolation: type of interpolation between steps. Possible values: None, Linear or Spline.
Timeout: timeout between playing frames. Actually this slider is in a logarithmic scale from 50 to 10000 milliseconds, but it has been set from 0 to 100 for the sake of simplicity.
Loop: if enabled plays the trajectory indefinitely.
Autoplay: if enabled plays the trajectory automatically.
Bounce: if enabled plays in rock / bounce mode (back and forth).
Share

The Share button, located at the top right of the stage, opens a modal window for creating a shared version of the current project.
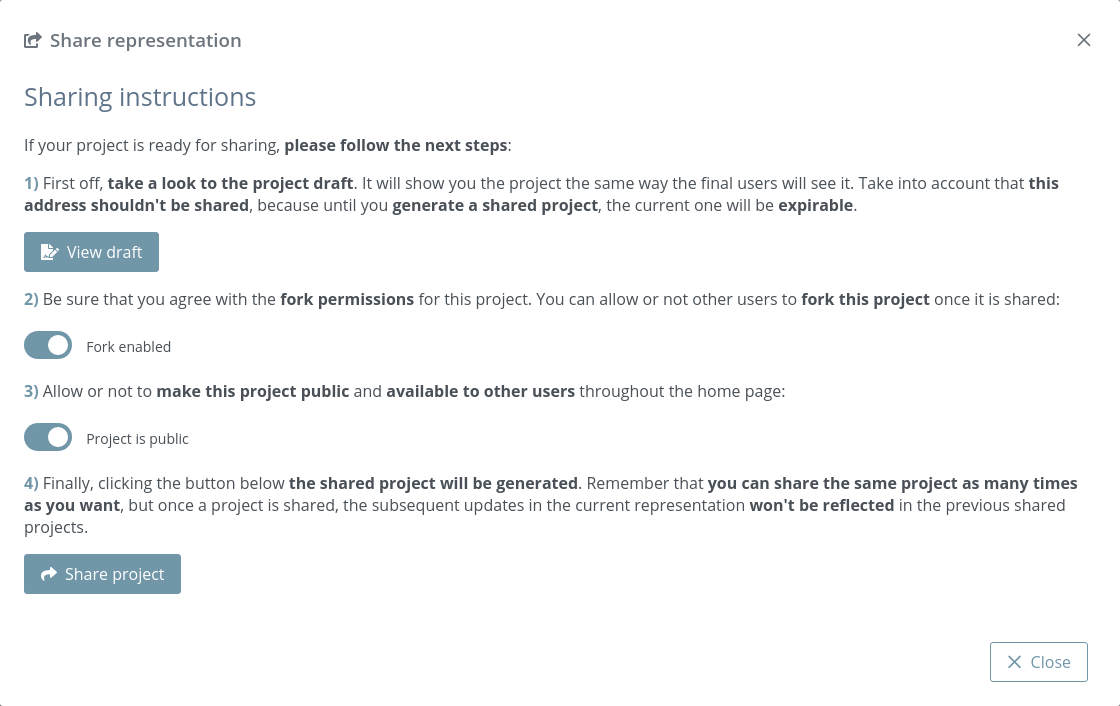
In this window, users must follow four steps:
Draft
Take a look at the project Draft. This Draft is an exact copy of the Shared project so it allows users to figure how the final project will look.
Note that as a draft version of the final Shared page, some of the actions are disabled in this draft page: Embed code, QR code generation and fork project. The rest of the actions are exactly the same as in the final Shared version.
Fork
Be sure to agree with the fork permissions. Note that once the project is shared, if fork is enabled, every user with the Share representation link will be able to fork and edit it.
Public
Be sure to agree with the public permissions. Note that once the project is shared, if public is enabled, the shared project will be available from the Last projects list in the home page.
Share
Finally, clicking the Share project button will generate a new read-only project with a different identifier. Once the button is pressed, three new sections will appear in the modal window.
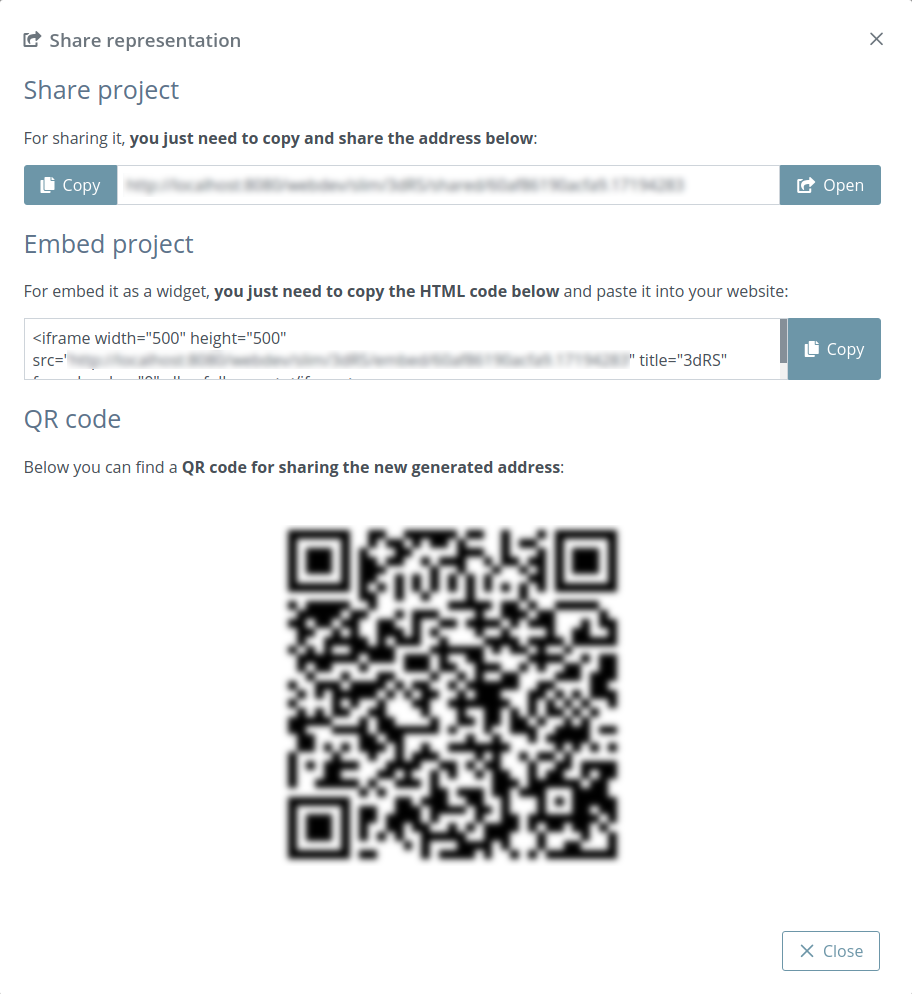
A text box with the new address with a couple of buttons for copying or opening it.
A text box with the embed code. Just copy and paste this code to a new website to embed it.
A QR code that opens the new address.
It’s very important to notice that you can share the same project as many times as you want, but once a project is shared, the subsequent updates in the current representation won’t be reflected in the previous shared projects.